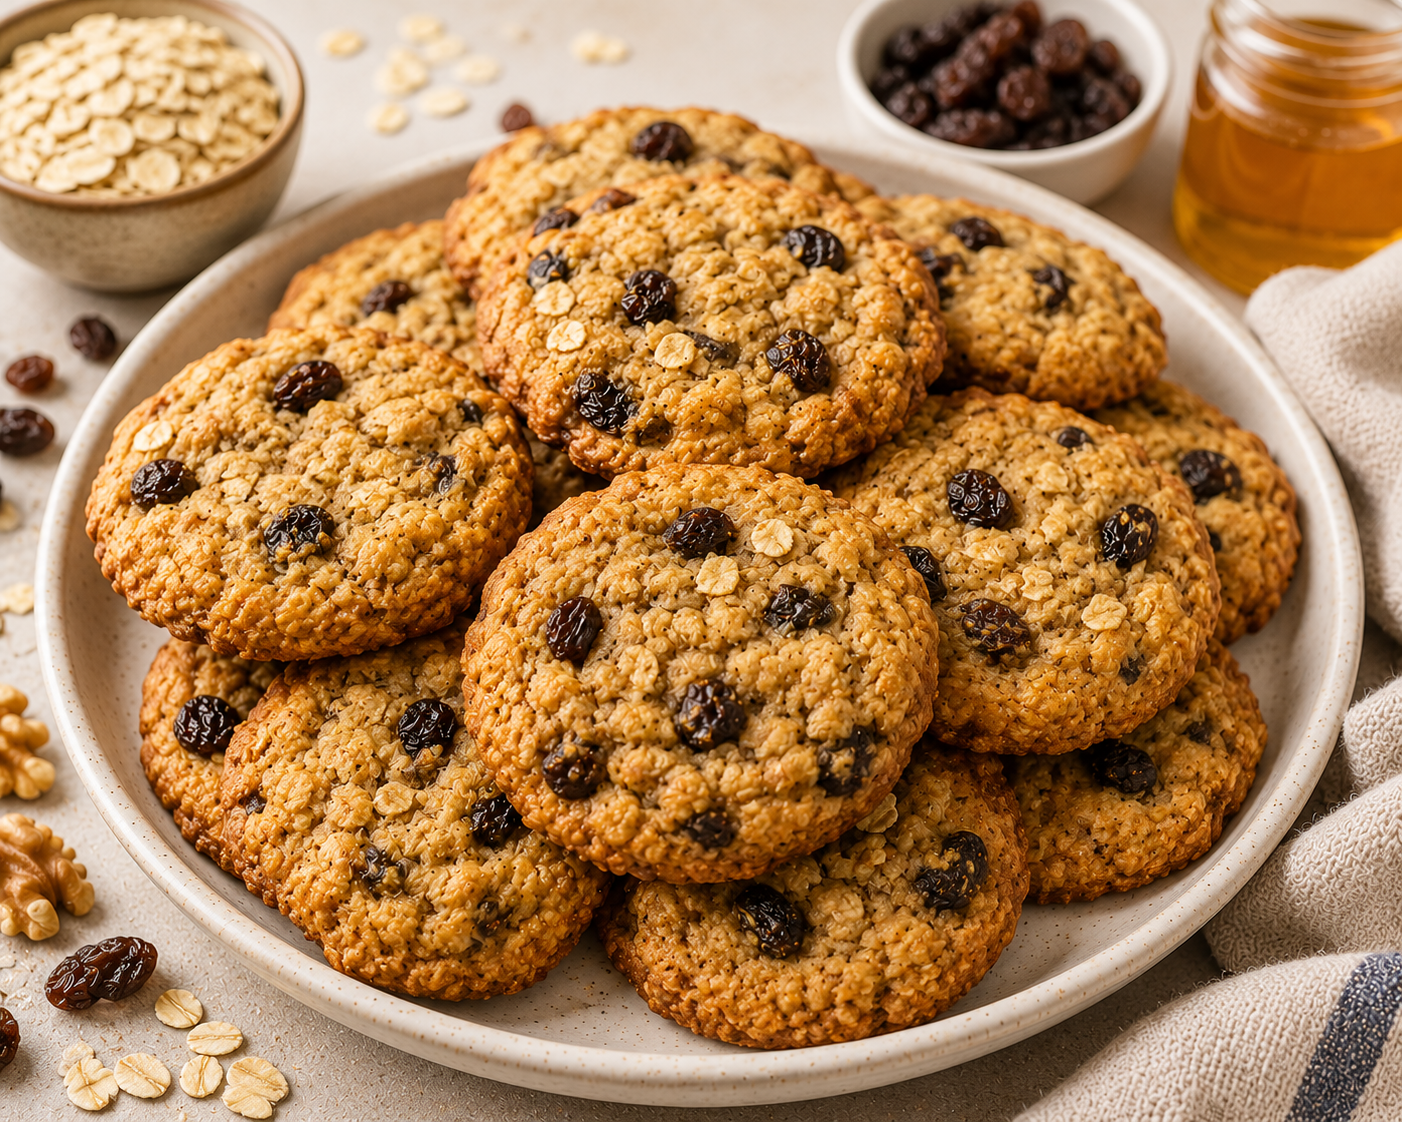
• Healthy Oatmeal Raisin Cookies


    Category: Healthy Snacks & Treats

    Labels: V • DF Option • GF Option • EF Option • Family-Friendly

    Yield: 16–18 cookies

    Prep Time: 15 minutes

    Bake Time: 10–12 minutes

    Total Time: About 30 minutes


    Description


    Soft, chewy, and packed with hearty oats and naturally sweet raisins, these Healthy Oatmeal Raisin Cookies are a satisfying snack for any time of day. Made with simple ingredients and lightly sweetened, they offer a comforting homemade flavor with a tender texture and hints of cinnamon in every bite. Perfect for lunchboxes, afternoon snacks, or sharing with family and friends, these cookies are both wholesome and delicious.


    Ingredients


    1. 1 cup (90g) rolled oats
    2. ¾ cup (90g) whole wheat flour
    3. 1 teaspoon ground cinnamon
    4. ½ teaspoon baking soda
    5. ¼ teaspoon fine salt
    6. ⅓ cup (80ml) melted coconut oil or melted butter
    7. ⅓ cup (80ml) honey or maple syrup
    8. 1 large egg
    9. 1 teaspoon vanilla extract
    10. ½ cup (75g) raisins
    11. Optional: 2 tablespoons chopped walnuts or pecans


    Method


    1. Preheat the oven to 180°C (350°F). Line a baking tray with parchment paper or lightly grease it.
    2. In a medium bowl, whisk together the oats, flour, cinnamon, baking soda, and salt.
    3. In a separate bowl, whisk together the melted coconut oil (or butter), honey (or maple syrup), egg, and vanilla extract until smooth.
    4. Add the wet ingredients to the dry ingredients and stir until combined.
    5. Fold in the raisins and optional nuts.
    6. Let the mixture rest for 5 minutes so the oats can absorb some moisture.
    7. Scoop tablespoon-sized portions of dough onto the prepared baking tray, spacing them about 5 cm (2 inches) apart. Gently flatten each cookie slightly with the back of a spoon.
    8. Bake for 10–12 minutes, or until:
    9. The edges are lightly golden.
    10. The centers appear set.
    11. The internal temperature reaches approximately 88–93°C (190–200°F).
    12. Allow the cookies to cool on the baking tray for 5 minutes before transferring them to a wire rack to cool completely.


    Healthy Snack Options


    1. V (Vegetarian): Contains no meat products.
    2. DF (Dairy-Free Option): Use coconut oil instead of butter.
    3. GF (Gluten-Free Option): Use certified gluten-free oats and a gluten-free flour blend.
    4. EF (Egg-Free Option): Replace the egg with 1 flax egg (1 tbsp ground flaxseed + 3 tbsp water, rested 5 minutes).
    5. Family-Friendly: Soft texture and mild sweetness make these cookies suitable for all ages.


    Storage


    1. Room temperature (airtight container): up to 4 days
    2. Refrigerated: up to 1 week
    3. Frozen (sealed container or freezer bag): up to 3 months

    Allow cookies to cool completely before storing to maintain their texture.


    Daily Delights Tip


    For extra plump and juicy raisins, soak them in warm water for 5–10 minutes, then drain and pat dry before adding them to the dough. This helps keep the cookies soft and moist after baking.

    Healthy Oatmeal Raisin CookiesCategory: Healthy Snacks & TreatsLabels: V • DF Option • GF Option • EF Option • Family-FriendlyYield: 16–18 cookiesPrep Time: 15 minutesBake Time: 10–12 minutesTotal Time: About 30 minutesDescriptionSoft, chewy, and packed with hearty oats and naturally sweet raisins, these Healthy Oatmeal Raisin Cookies are a satisfying snack for any time of day. Made with simple ingredients and lightly sweetened, they offer a comforting homemade flavor with a tender texture and hints of cinnamon in every bite. Perfect for lunchboxes, afternoon snacks, or sharing with family and friends, these cookies are both wholesome and delicious.Ingredients1 cup (90g) rolled oats¾ cup (90g) whole wheat flour1 teaspoon ground cinnamon½ teaspoon baking soda¼ teaspoon fine salt⅓ cup (80ml) melted coconut oil or melted butter⅓ cup (80ml) honey or maple syrup1 large egg1 teaspoon vanilla extract½ cup (75g) raisinsOptional: 2 tablespoons chopped walnuts or pecansMethodPreheat the oven to 180°C (350°F). Line a baking tray with parchment paper or lightly grease it.In a medium bowl, whisk together the oats, flour, cinnamon, baking soda, and salt.In a separate bowl, whisk together the melted coconut oil (or butter), honey (or maple syrup), egg, and vanilla extract until smooth.Add the wet ingredients to the dry ingredients and stir until combined.Fold in the raisins and optional nuts.Let the mixture rest for 5 minutes so the oats can absorb some moisture.Scoop tablespoon-sized portions of dough onto the prepared baking tray, spacing them about 5 cm (2 inches) apart. Gently flatten each cookie slightly with the back of a spoon.Bake for 10–12 minutes, or until:The edges are lightly golden.The centers appear set.The internal temperature reaches approximately 88–93°C (190–200°F).Allow the cookies to cool on the baking tray for 5 minutes before transferring them to a wire rack to cool completely.Healthy Snack OptionsV (Vegetarian): Contains no meat products.DF (Dairy-Free Option): Use coconut oil instead of butter.GF (Gluten-Free Option): Use certified gluten-free oats and a gluten-free flour blend.EF (Egg-Free Option): Replace the egg with 1 flax egg (1 tbsp ground flaxseed + 3 tbsp water, rested 5 minutes).Family-Friendly: Soft texture and mild sweetness make these cookies suitable for all ages.StorageRoom temperature (airtight container): up to 4 daysRefrigerated: up to 1 weekFrozen (sealed container or freezer bag): up to 3 monthsAllow cookies to cool completely before storing to maintain their texture.Daily Delights TipFor extra plump and juicy raisins, soak them in warm water for 5–10 minutes, then drain and pat dry before adding them to the dough. This helps keep the cookies soft and moist after baking.
    0 Comments 0 Shares 5K Views 0 Reviews
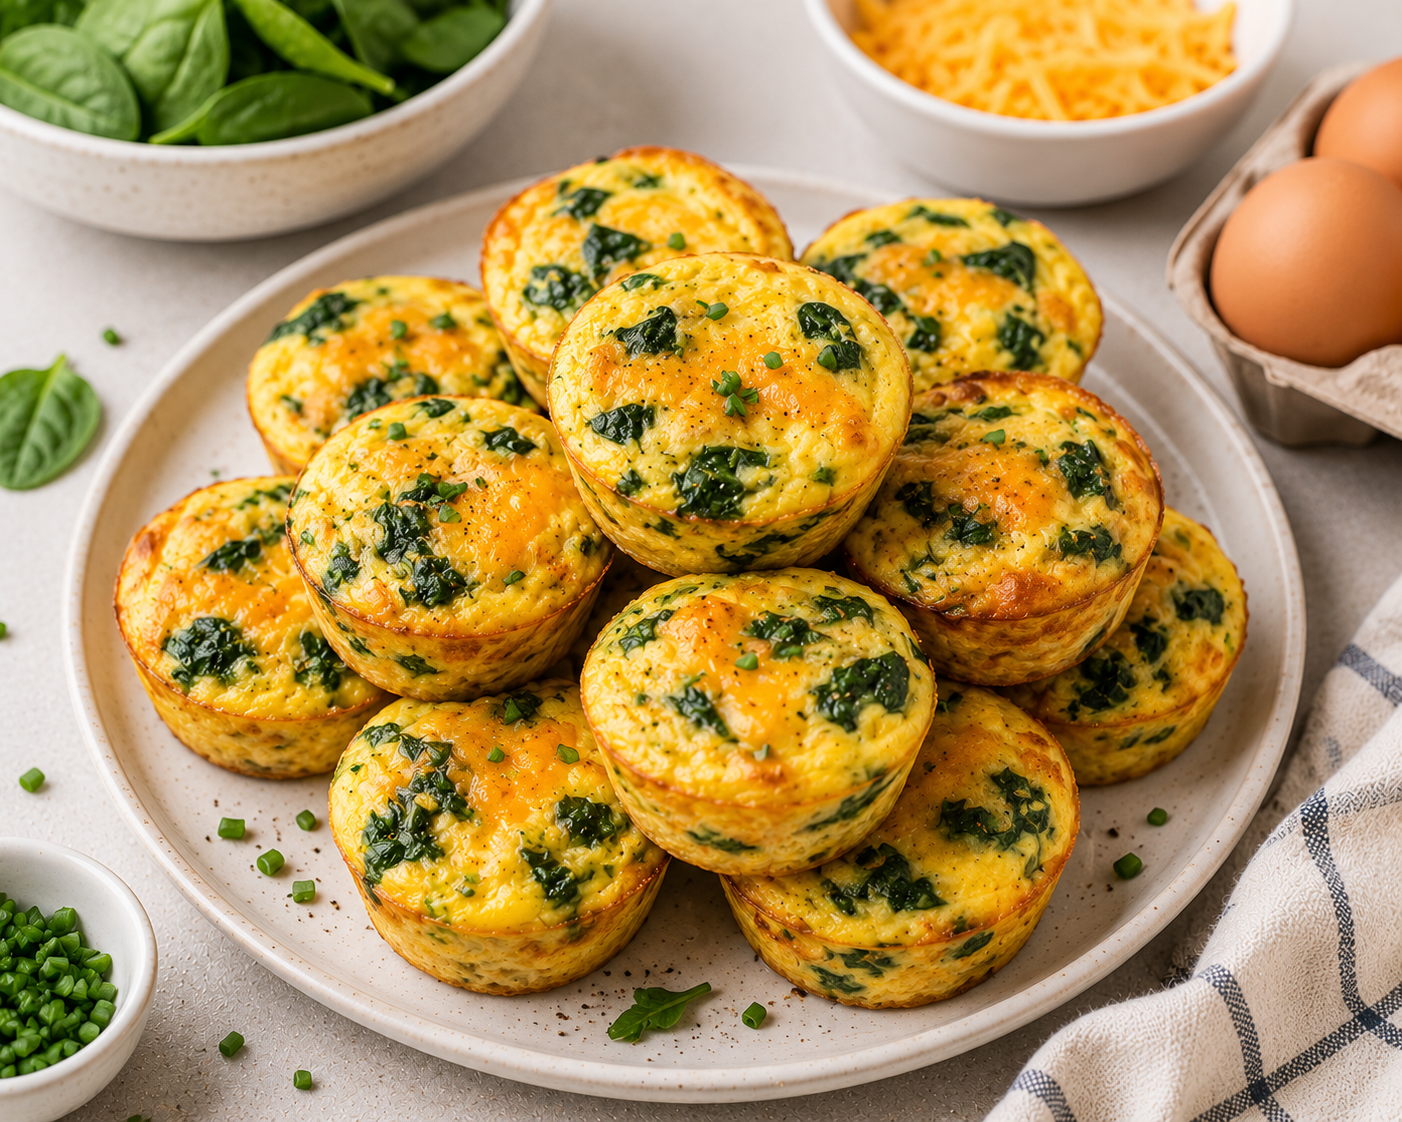
  • Spinach & Cheese Egg Muffin Cups


    Category: Healthy Breakfasts

    Labels: V • GF • Low-Carb • Meal-Prep Friendly • Family-Friendly

    Yield: 12 egg muffin cups

    Prep Time: 10 minutes

    Bake Time: 18–22 minutes

    Total Time: About 30–35 minutes


    Description


    Light, fluffy, and packed with savory flavor, these Spinach & Cheese Egg Muffin Cups are a simple breakfast that’s perfect for busy mornings. Made with eggs, spinach, and cheese, they bake into tender, protein-rich bites that are easy to prepare ahead of time. Whether enjoyed fresh from the oven or reheated during the week, these muffin cups make a convenient and satisfying breakfast for the whole family.


    Ingredients


    1. 8 large eggs
    2. ¼ cup (60ml) milk of choice
    3. 1 cup (30g) fresh spinach, finely chopped
    4. ¾ cup (85g) shredded cheddar cheese
    5. ¼ teaspoon fine salt
    6. ¼ teaspoon black pepper
    7. ¼ teaspoon garlic powder (optional)
    8. 1 tablespoon finely chopped chives or parsley (optional)
    9. Non-stick cooking spray or a small amount of oil for greasing


    Optional add-ins:


    1. Diced bell peppers
    2. Chopped mushrooms
    3. Diced tomatoes (seeds removed)
    4. Finely chopped onion
    5. Crumbled feta cheese


    Method


    1. Preheat the oven to 180°C (350°F). Lightly grease a 12-cup muffin tin or line with silicone muffin liners.
    2. In a large mixing bowl, whisk together the eggs and milk until smooth and well combined.
    3. Stir in the spinach, shredded cheese, salt, pepper, garlic powder, and any optional herbs.
    4. Divide the mixture evenly among the prepared muffin cups, filling each about three-quarters full.
    5. Bake for 18–22 minutes, or until:
    6. The centers are set and no longer jiggly.
    7. The tops are lightly golden.
    8. The internal temperature reaches 71°C (160°F) or higher.
    9. Remove from the oven and allow the muffin cups to cool in the pan for 5 minutes.
    10. Carefully loosen the edges and transfer to a wire rack or serving plate.
    11. Serve warm or allow to cool completely for meal prep storage.


    Healthy Breakfast Options


    1. V (Vegetarian): Contains no meat products.
    2. GF (Gluten-Free): Naturally gluten-free when prepared with gluten-free ingredients.
    3. Low-Carb: Lower in carbohydrates than many traditional breakfast options.
    4. Meal-Prep Friendly: Easy to prepare ahead and reheat throughout the week.
    5. Family-Friendly: Mild flavors and soft texture make these suitable for both children and adults.


    Storage


    1. Refrigerated (airtight container): up to 4 days
    2. Frozen (sealed freezer-safe container or freezer bag): up to 2 months

    Reheat in the microwave for 20–30 seconds or warm in a low oven until heated through.


    Daily Delights Tip


    To prevent excess moisture, pat the chopped spinach dry before mixing it into the eggs. If adding vegetables such as mushrooms or onions, sauté them briefly first to remove excess water and help keep the egg muffin cups fluffy.

    Spinach & Cheese Egg Muffin CupsCategory: Healthy BreakfastsLabels: V • GF • Low-Carb • Meal-Prep Friendly • Family-FriendlyYield: 12 egg muffin cupsPrep Time: 10 minutesBake Time: 18–22 minutesTotal Time: About 30–35 minutesDescriptionLight, fluffy, and packed with savory flavor, these Spinach & Cheese Egg Muffin Cups are a simple breakfast that’s perfect for busy mornings. Made with eggs, spinach, and cheese, they bake into tender, protein-rich bites that are easy to prepare ahead of time. Whether enjoyed fresh from the oven or reheated during the week, these muffin cups make a convenient and satisfying breakfast for the whole family.Ingredients8 large eggs¼ cup (60ml) milk of choice1 cup (30g) fresh spinach, finely chopped¾ cup (85g) shredded cheddar cheese¼ teaspoon fine salt¼ teaspoon black pepper¼ teaspoon garlic powder (optional)1 tablespoon finely chopped chives or parsley (optional)Non-stick cooking spray or a small amount of oil for greasingOptional add-ins:Diced bell peppersChopped mushroomsDiced tomatoes (seeds removed)Finely chopped onionCrumbled feta cheeseMethodPreheat the oven to 180°C (350°F). Lightly grease a 12-cup muffin tin or line with silicone muffin liners.In a large mixing bowl, whisk together the eggs and milk until smooth and well combined.Stir in the spinach, shredded cheese, salt, pepper, garlic powder, and any optional herbs.Divide the mixture evenly among the prepared muffin cups, filling each about three-quarters full.Bake for 18–22 minutes, or until:The centers are set and no longer jiggly.The tops are lightly golden.The internal temperature reaches 71°C (160°F) or higher.Remove from the oven and allow the muffin cups to cool in the pan for 5 minutes.Carefully loosen the edges and transfer to a wire rack or serving plate.Serve warm or allow to cool completely for meal prep storage.Healthy Breakfast OptionsV (Vegetarian): Contains no meat products.GF (Gluten-Free): Naturally gluten-free when prepared with gluten-free ingredients.Low-Carb: Lower in carbohydrates than many traditional breakfast options.Meal-Prep Friendly: Easy to prepare ahead and reheat throughout the week.Family-Friendly: Mild flavors and soft texture make these suitable for both children and adults.StorageRefrigerated (airtight container): up to 4 daysFrozen (sealed freezer-safe container or freezer bag): up to 2 monthsReheat in the microwave for 20–30 seconds or warm in a low oven until heated through.Daily Delights TipTo prevent excess moisture, pat the chopped spinach dry before mixing it into the eggs. If adding vegetables such as mushrooms or onions, sauté them briefly first to remove excess water and help keep the egg muffin cups fluffy.
    Love
    1
    0 Comments 0 Shares 6K Views 0 Reviews
  • Healthy Blueberry Oat Muffins


    Category: Healthy Bakes

    Labels: V • DF Option • GF Option • EF Option • Family-Friendly

    Yield: 12 muffins

    Prep Time: 10 minutes

    Bake Time: 18–22 minutes

    Total Time: About 35 minutes


    Description

    Soft, wholesome, and bursting with juicy blueberries, these Healthy Blueberry Oat Muffins are a delicious choice for breakfast, snacks, or lunchboxes. Made with oats, simple pantry ingredients, and natural sweetness, they offer a tender texture with fruity flavor in every bite.Easy to prepare and family-friendly, these muffins are perfect for busy mornings, afternoon snacks, or make-ahead treats.


    Ingredients


    .1 cup (90g) rolled oats

    .1 cup (120g) all-purpose flour

    .½ cup (60g) whole wheat flour (or additional all-purpose flour)

    .1 teaspoon baking powder

    .½ teaspoon baking soda

    .½ teaspoon ground cinnamon

    .¼ teaspoon fine salt

    .2 large eggs

    .⅓ cup (80ml) honey or maple syrup

    .⅓ cup (80ml) melted coconut oil or melted butter

    .½ cup (120ml) milk of choice

    .1 teaspoon vanilla extract

    .1 cup (150g) fresh or frozen blueberries

    Optional add-ins:

    .1 tablespoon chia seeds

    .2 tablespoons chopped nuts

    .1 tablespoon rolled oats for topping


    Method

    1. Preheat oven to 180°C (350°F). Line a 12-cup muffin tray with paper liners or lightly grease the muffin cups.

    2. In a large bowl, combine rolled oats, flour, baking powder, baking soda, cinnamon, and salt.

    3. In a separate bowl, whisk together eggs, honey (or maple syrup), melted coconut oil (or butter), milk, and vanilla extract until smooth.

    4. Pour the wet ingredients into the dry ingredients and stir gently until just combined.

    5. Fold in the blueberries and any optional add-ins if using. Avoid overmixing.

    6. Divide the batter evenly among the prepared muffin cups, filling each about ¾ full. Sprinkle extra oats on top if desired.

    7. Bake for 18–22 minutes, or until:.A toothpick inserted into the center comes out clean.The tops are lightly golden.Internal temperature reaches about 95–98°C (203–208°F)

    8. Allow the muffins to cool in the pan for 5–10 minutes, then transfer to a wire rack to cool completely.


    Healthy Bakes Options

    .V (Vegetarian): Contains no meat products.

    .DF (Dairy-Free Option): Use coconut oil and plant-based milk.

    .GF (Gluten-Free Option): Use certified gluten-free oats and a gluten-free all-purpose flour blend.

    .EF (Egg-Free Option): Replace eggs with 2 flax eggs (2 tbsp ground flaxseed + 6 tbsp water, rested 5 minutes).

    .Family-Friendly: Soft texture, mild sweetness, and fruity flavor make these muffins suitable for all ages.


    Storage

    .Room temperature (airtight container): up to 2–3 days

    .Refrigerated: up to 5–6 days

    .Frozen (stored in a sealed container or freezer bag): up to 3 months

    Allow muffins to cool completely before storing to maintain the best texture and freshness.


    Daily Delights Tip

    For extra juicy muffins, toss the blueberries lightly in a teaspoon of flour before folding them into the batter —this helps prevent them from sinking to the bottom during baking.

    Healthy Blueberry Oat MuffinsCategory: Healthy Bakes Labels: V • DF Option • GF Option • EF Option • Family-Friendly Yield: 12 muffins Prep Time: 10 minutes Bake Time: 18–22 minutes Total Time: About 35 minutesDescriptionSoft, wholesome, and bursting with juicy blueberries, these Healthy Blueberry Oat Muffins are a delicious choice for breakfast, snacks, or lunchboxes. Made with oats, simple pantry ingredients, and natural sweetness, they offer a tender texture with fruity flavor in every bite.Easy to prepare and family-friendly, these muffins are perfect for busy mornings, afternoon snacks, or make-ahead treats.Ingredients.1 cup (90g) rolled oats.1 cup (120g) all-purpose flour.½ cup (60g) whole wheat flour (or additional all-purpose flour).1 teaspoon baking powder.½ teaspoon baking soda.½ teaspoon ground cinnamon.¼ teaspoon fine salt.2 large eggs.⅓ cup (80ml) honey or maple syrup.⅓ cup (80ml) melted coconut oil or melted butter.½ cup (120ml) milk of choice.1 teaspoon vanilla extract.1 cup (150g) fresh or frozen blueberriesOptional add-ins:.1 tablespoon chia seeds.2 tablespoons chopped nuts.1 tablespoon rolled oats for toppingMethod1. Preheat oven to 180°C (350°F). Line a 12-cup muffin tray with paper liners or lightly grease the muffin cups.2. In a large bowl, combine rolled oats, flour, baking powder, baking soda, cinnamon, and salt.3. In a separate bowl, whisk together eggs, honey (or maple syrup), melted coconut oil (or butter), milk, and vanilla extract until smooth.4. Pour the wet ingredients into the dry ingredients and stir gently until just combined.5. Fold in the blueberries and any optional add-ins if using. Avoid overmixing.6. Divide the batter evenly among the prepared muffin cups, filling each about ¾ full. Sprinkle extra oats on top if desired.7. Bake for 18–22 minutes, or until:.A toothpick inserted into the center comes out clean.The tops are lightly golden.Internal temperature reaches about 95–98°C (203–208°F)8. Allow the muffins to cool in the pan for 5–10 minutes, then transfer to a wire rack to cool completely.Healthy Bakes Options.V (Vegetarian): Contains no meat products..DF (Dairy-Free Option): Use coconut oil and plant-based milk..GF (Gluten-Free Option): Use certified gluten-free oats and a gluten-free all-purpose flour blend..EF (Egg-Free Option): Replace eggs with 2 flax eggs (2 tbsp ground flaxseed + 6 tbsp water, rested 5 minutes)..Family-Friendly: Soft texture, mild sweetness, and fruity flavor make these muffins suitable for all ages.Storage.Room temperature (airtight container): up to 2–3 days.Refrigerated: up to 5–6 days.Frozen (stored in a sealed container or freezer bag): up to 3 monthsAllow muffins to cool completely before storing to maintain the best texture and freshness.Daily Delights TipFor extra juicy muffins, toss the blueberries lightly in a teaspoon of flour before folding them into the batter —this helps prevent them from sinking to the bottom during baking.
    Love
    1
    0 Comments 0 Shares 4K Views 0 Reviews
  • KJV:

    According as his divine power hath given unto us all things that pertain unto life and godliness, through the knowledge of him that hath called us to glory and virtue.

    2 Peter 1:3

    KJV: According as his divine power hath given unto us all things that pertain unto life and godliness, through the knowledge of him that hath called us to glory and virtue. 2 Peter 1:3
    Love
    2
    0 Comments 0 Shares 1K Views 0 Reviews
  • NLT:

    People who accept discipline are on the pathway to life,
    but those who ignore correction will go astray.

    Proverbs 10:17
    NLT: People who accept discipline are on the pathway to life, but those who ignore correction will go astray. Proverbs 10:17
    Like
    Love
    2
    0 Comments 0 Shares 771 Views 0 Reviews
  • Healthy Banana Bread

    Category: Healthy Bakes
    Labels: V • DF Option • GF Option • EF Option • Family-Friendly
    Yield: 1 loaf (8–10 slices)
    Prep Time: 10 minutes
    Bake Time: 45–55 minutes
    Total Time: About 1 hour 5 minutes

    Description

    Moist, naturally sweet, and full of rich banana flavor, this Healthy Banana Bread is a wholesome twist on a classic favorite. Made with simple ingredients and ripe bananas, it delivers a soft texture with just the right amount of sweetness.

    Perfect for breakfast, snacks, or a comforting treat, this loaf is easy to make and ideal for using up overripe bananas.

    Ingredients

    .3 medium ripe bananas, mashed

    .2 large eggs

    .¼ cup (60ml) honey or maple syrup

    .¼ cup (60ml) melted butter or coconut oil

    .¼ cup (60ml) milk of choice

    .1 teaspoon vanilla extract

    .1½ cups (180g) all-purpose flour

    .½ cup (60g) whole wheat flour (or additional all-purpose flour)

    .1 teaspoon baking soda

    .½ teaspoon ground cinnamon

    .¼ teaspoon fine salt

    Optional add-ins:

    .¼ cup (40g) chocolate chips

    .¼ cup chopped nuts

    Method

    1. Preheat oven to 175°C (350°F). Lightly grease or line a loaf pan.

    2. In a large bowl, mash the bananas until smooth.

    3. Add eggs, honey (or maple syrup), melted butter (or coconut oil), milk, and vanilla. Mix until well combined.

    4. In a separate bowl, whisk together flour, baking soda, cinnamon, and salt.

    5. Add the dry ingredients to the wet ingredients and stir gently until just combined. Do not overmix.

    6. Fold in optional add-ins if using.

    7. Pour batter into the prepared loaf pan and smooth the top.

    8. Bake for 45–55 minutes, or until:

    .A toothpick inserted into the center comes out clean

    .The top is golden brown

    .Internal temperature reaches about 96–98°C (205–208°F)

    9. Allow the bread to cool in the pan for 10 minutes, then transfer to a wire rack to cool completely.

    Healthy Bakes Options

    .V (Vegetarian): Contains no meat products.

    .DF (Dairy-Free Option): Use coconut oil and plant-based milk.

    .GF (Gluten-Free Option): Use a gluten-free all-purpose flour blend with xanthan gum.

    .EF(Egg-Free Option): Replace eggs with 2 flax eggs (2 tbsp ground flaxseed + 6 tbsp water, rested 5 minutes).

    .Family-Friendly: Soft texture and natural sweetness make it perfect for all ages.

    Storage

    .Room temperature (airtight container): up to 3 days

    .Refrigerated: up to 5–6 days

    .Frozen (sliced and wrapped well): up to 3 months

    Ensure the loaf is fully cooled before storing to prevent excess moisture.

    Daily Delights Tip

    For extra moisture and flavor, use very ripe bananas with brown spots—they provide natural sweetness and the best texture.
    Healthy Banana Bread Category: Healthy Bakes Labels: V • DF Option • GF Option • EF Option • Family-Friendly Yield: 1 loaf (8–10 slices) Prep Time: 10 minutes Bake Time: 45–55 minutes Total Time: About 1 hour 5 minutes Description Moist, naturally sweet, and full of rich banana flavor, this Healthy Banana Bread is a wholesome twist on a classic favorite. Made with simple ingredients and ripe bananas, it delivers a soft texture with just the right amount of sweetness. Perfect for breakfast, snacks, or a comforting treat, this loaf is easy to make and ideal for using up overripe bananas. Ingredients .3 medium ripe bananas, mashed .2 large eggs .¼ cup (60ml) honey or maple syrup .¼ cup (60ml) melted butter or coconut oil .¼ cup (60ml) milk of choice .1 teaspoon vanilla extract .1½ cups (180g) all-purpose flour .½ cup (60g) whole wheat flour (or additional all-purpose flour) .1 teaspoon baking soda .½ teaspoon ground cinnamon .¼ teaspoon fine salt Optional add-ins: .¼ cup (40g) chocolate chips .¼ cup chopped nuts Method 1. Preheat oven to 175°C (350°F). Lightly grease or line a loaf pan. 2. In a large bowl, mash the bananas until smooth. 3. Add eggs, honey (or maple syrup), melted butter (or coconut oil), milk, and vanilla. Mix until well combined. 4. In a separate bowl, whisk together flour, baking soda, cinnamon, and salt. 5. Add the dry ingredients to the wet ingredients and stir gently until just combined. Do not overmix. 6. Fold in optional add-ins if using. 7. Pour batter into the prepared loaf pan and smooth the top. 8. Bake for 45–55 minutes, or until: .A toothpick inserted into the center comes out clean .The top is golden brown .Internal temperature reaches about 96–98°C (205–208°F) 9. Allow the bread to cool in the pan for 10 minutes, then transfer to a wire rack to cool completely. Healthy Bakes Options .V (Vegetarian): Contains no meat products. .DF (Dairy-Free Option): Use coconut oil and plant-based milk. .GF (Gluten-Free Option): Use a gluten-free all-purpose flour blend with xanthan gum. .EF(Egg-Free Option): Replace eggs with 2 flax eggs (2 tbsp ground flaxseed + 6 tbsp water, rested 5 minutes). .Family-Friendly: Soft texture and natural sweetness make it perfect for all ages. Storage .Room temperature (airtight container): up to 3 days .Refrigerated: up to 5–6 days .Frozen (sliced and wrapped well): up to 3 months Ensure the loaf is fully cooled before storing to prevent excess moisture. Daily Delights Tip For extra moisture and flavor, use very ripe bananas with brown spots—they provide natural sweetness and the best texture.
    Love
    2
    0 Comments 0 Shares 4K Views 0 Reviews
  • No-Bake Energy Balls

    Category: Healthy Snacks
    Labels: V • GF Option • DF Option • EF Option • Family-Friendly
    Yield: 12–14 balls
    Prep Time: 10 minutes
    Chill Time: 30 minutes
    Total Time: 40 minutes

    Description

    Quick, wholesome, and naturally sweet, these No-Bake Energy Balls are a perfect on-the-go snack. Packed with oats, nut butter, seeds, and optional chocolate, they provide protein, fiber, and energy without any baking.

    Ideal for lunchboxes, post-workout fuel, or a simple treat anytime you need a boost.

    Ingredients

    .1 cup (90g) rolled oats

    .½ cup (120g) nut butter (peanut, almond, or cashew)

    .¼ cup (60ml) honey or maple syrup

    .2 tablespoons chia seeds or flaxseeds

    .2 tablespoons unsweetened cocoa powder (optional for chocolate flavor)

    .½ teaspoon vanilla extract

    .¼ teaspoon salt

    .¼ cup (40g) mini chocolate chips, dried fruit, or chopped nuts (optional)

    Method

    1. In a medium bowl, combine the oats, nut butter, honey (or maple syrup), chia/flax seeds, cocoa powder, vanilla, and salt.

    2. Mix until fully combined into a sticky dough.

    3. Stir in optional add-ins like chocolate chips, dried fruit, or chopped nuts.

    4. Using a tablespoon or small cookie scoop, roll the mixture into 12–14 balls.

    5. Place the balls on a parchment-lined tray and refrigerate for 30 minutes to firm up.

    6. Store in an airtight container in the refrigerator or freezer.

    Healthy Bakes Options

    .V (Vegan): Use maple syrup instead of honey.

    .GF (Gluten-Free Option): Use certified gluten-free oats.

    .DF (Dairy-Free Option): Naturally dairy-free; avoid chocolate with milk if necessary.

    .EF (Egg-Free Option): No eggs are needed.

    .Family-Friendly: Soft, chewy, and naturally sweet — perfect for kids.

    Storage

    .Refrigerated (airtight container): up to 7 days

    .Frozen (airtight container): up to 3 months

    Daily Delights Tip

    For variety, roll the energy balls in unsweetened shredded coconut, cocoa powder, or finely chopped nuts for a fun and tasty finish.
    No-Bake Energy Balls Category: Healthy Snacks Labels: V • GF Option • DF Option • EF Option • Family-Friendly Yield: 12–14 balls Prep Time: 10 minutes Chill Time: 30 minutes Total Time: 40 minutes Description Quick, wholesome, and naturally sweet, these No-Bake Energy Balls are a perfect on-the-go snack. Packed with oats, nut butter, seeds, and optional chocolate, they provide protein, fiber, and energy without any baking. Ideal for lunchboxes, post-workout fuel, or a simple treat anytime you need a boost. Ingredients .1 cup (90g) rolled oats .½ cup (120g) nut butter (peanut, almond, or cashew) .¼ cup (60ml) honey or maple syrup .2 tablespoons chia seeds or flaxseeds .2 tablespoons unsweetened cocoa powder (optional for chocolate flavor) .½ teaspoon vanilla extract .¼ teaspoon salt .¼ cup (40g) mini chocolate chips, dried fruit, or chopped nuts (optional) Method 1. In a medium bowl, combine the oats, nut butter, honey (or maple syrup), chia/flax seeds, cocoa powder, vanilla, and salt. 2. Mix until fully combined into a sticky dough. 3. Stir in optional add-ins like chocolate chips, dried fruit, or chopped nuts. 4. Using a tablespoon or small cookie scoop, roll the mixture into 12–14 balls. 5. Place the balls on a parchment-lined tray and refrigerate for 30 minutes to firm up. 6. Store in an airtight container in the refrigerator or freezer. Healthy Bakes Options .V (Vegan): Use maple syrup instead of honey. .GF (Gluten-Free Option): Use certified gluten-free oats. .DF (Dairy-Free Option): Naturally dairy-free; avoid chocolate with milk if necessary. .EF (Egg-Free Option): No eggs are needed. .Family-Friendly: Soft, chewy, and naturally sweet — perfect for kids. Storage .Refrigerated (airtight container): up to 7 days .Frozen (airtight container): up to 3 months Daily Delights Tip For variety, roll the energy balls in unsweetened shredded coconut, cocoa powder, or finely chopped nuts for a fun and tasty finish.
    Like
    Love
    2
    0 Comments 0 Shares 3K Views 0 Reviews
  • Healthy Cinnamon Rolls

    Category: Healthy Bakes
    Labels: V Option • DF Option • EF Option • Family-Friendly
    Yield: 8–10 rolls
    Prep Time: 20 minutes
    Rise Time: 45–60 minutes
    Bake Time: 18–22 minutes
    Total Time: About 1 hour 30 minutes

    Description

    Soft, warm, and filled with comforting cinnamon flavor, these Healthy Cinnamon Rolls offer a lighter take on the classic favorite. Made with simple ingredients and naturally sweetened filling, they bake into tender spirals with a golden exterior and soft center.

    Perfect for weekend breakfasts, brunch gatherings, or a cozy homemade treat.

    Ingredients
    Dough

    .2 cups (250g) all-purpose flour

    .1 cup (120g) whole wheat flour

    .2 teaspoons instant yeast

    .2 tablespoons maple syrup or honey

    .¾ cup (180ml) warm milk of choice

    .2 tablespoons melted butter or coconut oil

    .1 teaspoon vanilla extract

    .½ teaspoon fine salt

    Cinnamon Filling

    .3 tablespoons brown sugar or coconut sugar

    .1½ teaspoons ground cinnamon

    .2 tablespoons softened butter or coconut oil

    Optional Light Glaze

    .½ cup powdered sugar

    .1–2 tablespoons milk of choice

    .¼ teaspoon vanilla extract

    Method

    1. In a large bowl, combine warm milk, maple syrup, and yeast. Let sit for about 5 minutes until slightly foamy.

    2. Add melted butter (or coconut oil), vanilla, salt, and both flours. Mix until a soft dough forms.

    3. Knead dough on a lightly floured surface for about 6–8 minutes until smooth and elastic.

    4. Place dough in a lightly greased bowl, cover, and allow it to rise in a warm place for 45–60 minutes, or until doubled in size.

    5. Roll the dough into a rectangle approximately 30 x 20 cm (12 x 8 inches).

    6. Spread softened butter over the surface, then sprinkle evenly with brown sugar and cinnamon.

    7. Roll the dough tightly from the long side into a log.

    8. Slice into 8–10 rolls and place them in a lined or lightly greased baking dish.

    9. Preheat oven to 180°C (350°F).

    10. Bake for 18–22 minutes, until the rolls are lightly golden and cooked through.

    11. Allow rolls to cool slightly before adding the optional glaze.

    Healthy Bakes Options

    .V (Vegetarian): Contains no meat products.

    .DF (Dairy-Free Option): Use plant milk and coconut oil instead of butter.

    .EF (Egg-Free Option): This recipe naturally contains no eggs.

    .Family-Friendly: Soft texture and warm cinnamon flavor appeal to all ages.

    Storage

    .Room temperature (airtight container): up to 2 days

    .Refrigerated: up to 5 days

    .Frozen (wrapped well): up to 2 months

    Reheat briefly in the microwave or oven before serving for best texture.

    Daily Delights Tip

    For extra soft rolls, cover the baking dish loosely with foil during the first half of baking, then uncover for the final minutes to allow gentle browning.
    Healthy Cinnamon Rolls Category: Healthy Bakes Labels: V Option • DF Option • EF Option • Family-Friendly Yield: 8–10 rolls Prep Time: 20 minutes Rise Time: 45–60 minutes Bake Time: 18–22 minutes Total Time: About 1 hour 30 minutes Description Soft, warm, and filled with comforting cinnamon flavor, these Healthy Cinnamon Rolls offer a lighter take on the classic favorite. Made with simple ingredients and naturally sweetened filling, they bake into tender spirals with a golden exterior and soft center. Perfect for weekend breakfasts, brunch gatherings, or a cozy homemade treat. Ingredients Dough .2 cups (250g) all-purpose flour .1 cup (120g) whole wheat flour .2 teaspoons instant yeast .2 tablespoons maple syrup or honey .¾ cup (180ml) warm milk of choice .2 tablespoons melted butter or coconut oil .1 teaspoon vanilla extract .½ teaspoon fine salt Cinnamon Filling .3 tablespoons brown sugar or coconut sugar .1½ teaspoons ground cinnamon .2 tablespoons softened butter or coconut oil Optional Light Glaze .½ cup powdered sugar .1–2 tablespoons milk of choice .¼ teaspoon vanilla extract Method 1. In a large bowl, combine warm milk, maple syrup, and yeast. Let sit for about 5 minutes until slightly foamy. 2. Add melted butter (or coconut oil), vanilla, salt, and both flours. Mix until a soft dough forms. 3. Knead dough on a lightly floured surface for about 6–8 minutes until smooth and elastic. 4. Place dough in a lightly greased bowl, cover, and allow it to rise in a warm place for 45–60 minutes, or until doubled in size. 5. Roll the dough into a rectangle approximately 30 x 20 cm (12 x 8 inches). 6. Spread softened butter over the surface, then sprinkle evenly with brown sugar and cinnamon. 7. Roll the dough tightly from the long side into a log. 8. Slice into 8–10 rolls and place them in a lined or lightly greased baking dish. 9. Preheat oven to 180°C (350°F). 10. Bake for 18–22 minutes, until the rolls are lightly golden and cooked through. 11. Allow rolls to cool slightly before adding the optional glaze. Healthy Bakes Options .V (Vegetarian): Contains no meat products. .DF (Dairy-Free Option): Use plant milk and coconut oil instead of butter. .EF (Egg-Free Option): This recipe naturally contains no eggs. .Family-Friendly: Soft texture and warm cinnamon flavor appeal to all ages. Storage .Room temperature (airtight container): up to 2 days .Refrigerated: up to 5 days .Frozen (wrapped well): up to 2 months Reheat briefly in the microwave or oven before serving for best texture. Daily Delights Tip For extra soft rolls, cover the baking dish loosely with foil during the first half of baking, then uncover for the final minutes to allow gentle browning.
    Love
    2
    0 Comments 0 Shares 4K Views 0 Reviews
  • #Glossary
    Vegan Chocolate Chip Cookies

    Category: Sweet Treats
    Labels: VN • DF • EF • Family-Friendly
    Yield: 12–16 cookies
    Prep Time: 10 minutes
    Bake Time: 10–12 minutes
    Total Time: Approximately 25 minutes

    Description

    These Vegan Chocolate Chip Cookies are soft in the center, lightly crisp around the edges, and filled with rich chocolate chips. Made without eggs or dairy, they rely on simple pantry ingredients to create a balanced cookie dough that bakes into delicious, satisfying treats.

    Perfect for everyday baking, sharing with friends, or enjoying with a warm drink.

    Ingredients

    .½ cup (115g) vegan butter or dairy-free baking spread, softened

    .½ cup (100g) light brown sugar

    .¼ cup (50g) granulated sugar

    .¼ cup (60ml) unsweetened plant milk (such as almond, oat, or soy)

    .1 teaspoon pure vanilla extract

    .1½ cups (180g) all-purpose flour

    .½ teaspoon baking soda

    .¼ teaspoon fine salt

    .¾ cup (130g) vegan chocolate chips

    Method

    1. Preheat oven to 180°C (350°F). Line a baking sheet with parchment paper.

    2. In a mixing bowl, cream together the vegan butter, brown sugar, and granulated sugar until smooth and slightly fluffy.

    3. Add the plant milk and vanilla extract. Stir until well combined.

    4. In a separate bowl, whisk together flour, baking soda, and salt.

    5. Gradually mix the dry ingredients into the wet mixture until a soft dough forms.

    6. Fold in the vegan chocolate chips.

    7. Scoop tablespoon-sized portions of dough and place them onto the prepared baking sheet, leaving space between cookies.

    8. Bake for 10–12 minutes, until edges are lightly golden while the centers remain soft.

    9. Allow cookies to cool on the baking sheet for 5 minutes before transferring to a wire rack to cool completely.

    Healthy Bakes Options

    .VN (Vegan): Uses plant-based ingredients with no animal products.

    .DF (Dairy-Free): Made with vegan butter and dairy-free chocolate chips.

    .EF (Egg-Free): No eggs required; plant milk provides moisture and structure.

    .Family-Friendly: Soft texture and classic flavor appeal to both children and adults.

    Storage

    .Room temperature (airtight container): up to 3 days

    .Refrigerated: up to 5 days

    .Frozen (baked cookies or raw dough): up to 3 months

    Allow cookies to cool fully before storing to maintain texture.

    Daily Delights Tip

    For thicker cookies, chill the dough in the refrigerator for 20–30 minutes before baking.
    #Glossary Vegan Chocolate Chip Cookies Category: Sweet Treats Labels: VN • DF • EF • Family-Friendly Yield: 12–16 cookies Prep Time: 10 minutes Bake Time: 10–12 minutes Total Time: Approximately 25 minutes Description These Vegan Chocolate Chip Cookies are soft in the center, lightly crisp around the edges, and filled with rich chocolate chips. Made without eggs or dairy, they rely on simple pantry ingredients to create a balanced cookie dough that bakes into delicious, satisfying treats. Perfect for everyday baking, sharing with friends, or enjoying with a warm drink. Ingredients .½ cup (115g) vegan butter or dairy-free baking spread, softened .½ cup (100g) light brown sugar .¼ cup (50g) granulated sugar .¼ cup (60ml) unsweetened plant milk (such as almond, oat, or soy) .1 teaspoon pure vanilla extract .1½ cups (180g) all-purpose flour .½ teaspoon baking soda .¼ teaspoon fine salt .¾ cup (130g) vegan chocolate chips Method 1. Preheat oven to 180°C (350°F). Line a baking sheet with parchment paper. 2. In a mixing bowl, cream together the vegan butter, brown sugar, and granulated sugar until smooth and slightly fluffy. 3. Add the plant milk and vanilla extract. Stir until well combined. 4. In a separate bowl, whisk together flour, baking soda, and salt. 5. Gradually mix the dry ingredients into the wet mixture until a soft dough forms. 6. Fold in the vegan chocolate chips. 7. Scoop tablespoon-sized portions of dough and place them onto the prepared baking sheet, leaving space between cookies. 8. Bake for 10–12 minutes, until edges are lightly golden while the centers remain soft. 9. Allow cookies to cool on the baking sheet for 5 minutes before transferring to a wire rack to cool completely. Healthy Bakes Options .VN (Vegan): Uses plant-based ingredients with no animal products. .DF (Dairy-Free): Made with vegan butter and dairy-free chocolate chips. .EF (Egg-Free): No eggs required; plant milk provides moisture and structure. .Family-Friendly: Soft texture and classic flavor appeal to both children and adults. Storage .Room temperature (airtight container): up to 3 days .Refrigerated: up to 5 days .Frozen (baked cookies or raw dough): up to 3 months Allow cookies to cool fully before storing to maintain texture. Daily Delights Tip For thicker cookies, chill the dough in the refrigerator for 20–30 minutes before baking.
    Love
    Yay
    2
    0 Comments 0 Shares 4K Views 0 Reviews
  • #Glossary
    Gluten-Free Fudgy Brownies

    Category: Healthy Bakes
    Labels: GF • DF Option • NF Option
    Yield: 9–12 squares
    Prep Time: 10 minutes
    Bake Time: 20–25 minutes
    Total Time: Approximately 35 minutes

    Description

    Rich, deeply chocolatey, and perfectly fudgy, these Gluten-Free Brownies deliver all the indulgence of a classic brownie without traditional wheat flour. Carefully balanced for structure and moisture, this recipe produces a soft center with slightly crisp edges.

    Ideal for gatherings, celebrations, or everyday chocolate cravings.

    Ingredients

    .½ cup (115g) unsalted butter, melted

    .¾ cup (150g) granulated sugar

    .¼ cup (50g) light brown sugar

    .2 large eggs, room temperature

    .1 teaspoon pure vanilla extract

    .½ cup (50g) unsweetened cocoa powder

    .½ cup (60g) gluten-free all-purpose flour blend (with xanthan gum included)

    .¼ teaspoon fine salt

    .½ teaspoon baking powder

    .½ cup (85g) dark chocolate chips

    Method

    1. Preheat oven to 175°C (350°F). Line an 8x8-inch (20x20 cm) baking pan with parchment paper, leaving slight overhang for easy removal.

    2. In a mixing bowl, whisk together melted butter, granulated sugar, and brown sugar until glossy and combined.

    3. Add eggs and vanilla. Whisk until smooth and slightly thickened.

    4. Sift in cocoa powder, gluten-free flour, salt, and baking powder. Fold gently until just combined. Do not overmix.

    5. Stir in chocolate chips.

    6. Spread batter evenly into prepared pan.

    7. Bake for 20–25 minutes, or until:

    .Edges are set

    .Center is slightly soft but not liquid

    .A toothpick inserted near the center comes out with moist crumbs (not wet batter)

    .Internal temperature reaches approximately 93–95°C (200°F)

    8. Cool completely in the pan before slicing for clean, fudgy squares.

    Healthy Bakes Options

    .GF (Gluten-Free): Use certified gluten-free flour blend containing xanthan gum.

    .DF (Dairy-Free Option): Replace butter with melted coconut oil or dairy-free baking spread.

    .NF (Nut-Free Option): Ensure chocolate chips and flour blend are processed in nut-free facilities if required.

    Storage

    .Room temperature (below 22°C / 72°F): up to 3 days in airtight container

    .Refrigerated: up to 6 days

    .Frozen (wrapped tightly): up to 3 months

    Allow brownies to cool fully before storing to prevent condensation.
    Discard if mold, sour smell, or texture changes occur.

    Daily Delights Tip

    For extra fudgy brownies, slightly underbake by 1–2 minutes and allow them to set fully as they cool.
    #Glossary Gluten-Free Fudgy Brownies Category: Healthy Bakes Labels: GF • DF Option • NF Option Yield: 9–12 squares Prep Time: 10 minutes Bake Time: 20–25 minutes Total Time: Approximately 35 minutes Description Rich, deeply chocolatey, and perfectly fudgy, these Gluten-Free Brownies deliver all the indulgence of a classic brownie without traditional wheat flour. Carefully balanced for structure and moisture, this recipe produces a soft center with slightly crisp edges. Ideal for gatherings, celebrations, or everyday chocolate cravings. Ingredients .½ cup (115g) unsalted butter, melted .¾ cup (150g) granulated sugar .¼ cup (50g) light brown sugar .2 large eggs, room temperature .1 teaspoon pure vanilla extract .½ cup (50g) unsweetened cocoa powder .½ cup (60g) gluten-free all-purpose flour blend (with xanthan gum included) .¼ teaspoon fine salt .½ teaspoon baking powder .½ cup (85g) dark chocolate chips Method 1. Preheat oven to 175°C (350°F). Line an 8x8-inch (20x20 cm) baking pan with parchment paper, leaving slight overhang for easy removal. 2. In a mixing bowl, whisk together melted butter, granulated sugar, and brown sugar until glossy and combined. 3. Add eggs and vanilla. Whisk until smooth and slightly thickened. 4. Sift in cocoa powder, gluten-free flour, salt, and baking powder. Fold gently until just combined. Do not overmix. 5. Stir in chocolate chips. 6. Spread batter evenly into prepared pan. 7. Bake for 20–25 minutes, or until: .Edges are set .Center is slightly soft but not liquid .A toothpick inserted near the center comes out with moist crumbs (not wet batter) .Internal temperature reaches approximately 93–95°C (200°F) 8. Cool completely in the pan before slicing for clean, fudgy squares. Healthy Bakes Options .GF (Gluten-Free): Use certified gluten-free flour blend containing xanthan gum. .DF (Dairy-Free Option): Replace butter with melted coconut oil or dairy-free baking spread. .NF (Nut-Free Option): Ensure chocolate chips and flour blend are processed in nut-free facilities if required. Storage .Room temperature (below 22°C / 72°F): up to 3 days in airtight container .Refrigerated: up to 6 days .Frozen (wrapped tightly): up to 3 months Allow brownies to cool fully before storing to prevent condensation. Discard if mold, sour smell, or texture changes occur. Daily Delights Tip For extra fudgy brownies, slightly underbake by 1–2 minutes and allow them to set fully as they cool.
    Love
    2
    0 Comments 0 Shares 4K Views 0 Reviews
  • #Glossary
    Banana Oat Blender Muffins

    Category: Healthy Bakes
    Labels: GF Option • DF Option • EF Option • Family-Friendly
    Yield: 10–12 standard muffins
    Prep Time: 5 minutes
    Bake Time: 18–22 minutes
    Total Time: Approximately 30 minutes

    Description

    Soft, naturally sweet, and made with simple whole ingredients, these Banana Oat Blender Muffins are a wholesome everyday bake. Blended in one step and baked to golden perfection, they are ideal for breakfast, lunchboxes, or satisfying snacks.

    Balanced for structure, moisture, and proper baking results when prepared as directed.

    Ingredients

    .2 large very ripe bananas (about 1 cup mashed / 240g)

    .2 cups (180g) rolled oats

    .2 large eggs

    .¼ cup (60ml) honey or pure maple syrup

    .¼ cup (60ml) milk of choice

    .1 teaspoon pure vanilla extract

    .1 teaspoon baking powder

    .½ teaspoon ground cinnamon

    .¼ teaspoon fine salt

    Optional Add-Ins:

    .¼ cup dark chocolate chips

    .¼ cup blueberries (fresh or frozen)

    .2 tablespoons chopped nuts

    Method

    1. Preheat oven to 180°C (350°F). Line or lightly grease a 12-cup muffin tin.

    2. Add all ingredients (except add-ins) to a blender.

    3. Blend until completely smooth and thick.

    4. Stir in optional add-ins if using.

    5. Divide batter evenly into muffin cups (¾ full).

    6. Bake 18–22 minutes until tops are set and a toothpick inserted comes out clean.

    7. Cool 5 minutes in the tin, then transfer to a wire rack to cool completely.

    Healthy Bakes Options

    GF: Use certified gluten-free rolled oats.

    DF: Use almond, oat, or coconut milk.

    EF: Replace eggs with 2 flax eggs (2 tbsp ground flaxseed + 6 tbsp water, rested 5 minutes).

    Storage

    Room temperature (below 22°C / 72°F): up to 2 days

    Refrigerated: up to 5 days

    Frozen: up to 3 months

    Cool completely before storing. Discard if signs of spoilage appear.

    Daily Delights Tip

    For extra moisture and sweetness, use bananas that are heavily spotted and soft. The riper the banana, the better the flavor.
    #Glossary Banana Oat Blender Muffins Category: Healthy Bakes Labels: GF Option • DF Option • EF Option • Family-Friendly Yield: 10–12 standard muffins Prep Time: 5 minutes Bake Time: 18–22 minutes Total Time: Approximately 30 minutes Description Soft, naturally sweet, and made with simple whole ingredients, these Banana Oat Blender Muffins are a wholesome everyday bake. Blended in one step and baked to golden perfection, they are ideal for breakfast, lunchboxes, or satisfying snacks. Balanced for structure, moisture, and proper baking results when prepared as directed. Ingredients .2 large very ripe bananas (about 1 cup mashed / 240g) .2 cups (180g) rolled oats .2 large eggs .¼ cup (60ml) honey or pure maple syrup .¼ cup (60ml) milk of choice .1 teaspoon pure vanilla extract .1 teaspoon baking powder .½ teaspoon ground cinnamon .¼ teaspoon fine salt Optional Add-Ins: .¼ cup dark chocolate chips .¼ cup blueberries (fresh or frozen) .2 tablespoons chopped nuts Method 1. Preheat oven to 180°C (350°F). Line or lightly grease a 12-cup muffin tin. 2. Add all ingredients (except add-ins) to a blender. 3. Blend until completely smooth and thick. 4. Stir in optional add-ins if using. 5. Divide batter evenly into muffin cups (¾ full). 6. Bake 18–22 minutes until tops are set and a toothpick inserted comes out clean. 7. Cool 5 minutes in the tin, then transfer to a wire rack to cool completely. Healthy Bakes Options GF: Use certified gluten-free rolled oats. DF: Use almond, oat, or coconut milk. EF: Replace eggs with 2 flax eggs (2 tbsp ground flaxseed + 6 tbsp water, rested 5 minutes). Storage Room temperature (below 22°C / 72°F): up to 2 days Refrigerated: up to 5 days Frozen: up to 3 months Cool completely before storing. Discard if signs of spoilage appear. Daily Delights Tip For extra moisture and sweetness, use bananas that are heavily spotted and soft. The riper the banana, the better the flavor.
    Love
    Like
    3
    0 Comments 0 Shares 3K Views 0 Reviews
  • https://trustoria.online/public/article.php?slug=how-a-publicprivate-partnership-is-turning-a-water-crisis-into-a-lifeline-for-ivory-park-learners
    https://trustoria.online/public/article.php?slug=how-a-publicprivate-partnership-is-turning-a-water-crisis-into-a-lifeline-for-ivory-park-learners
    TRUSTORIA.ONLINE
    How a Public–Private Partnership Is Turning a Water Crisis Into a Lifeline for Ivory Park Learners
    A groundbreaking sanitation and water initiative at Ivory Park Primary School is restoring dignity, health, and learning for more than 2,300 pupils affected by
    Love
    3
    0 Comments 0 Shares 1K Views 0 Reviews
More Results
MYSERA https://www.mysera.social