• NIV:

    They stripped him and put a scarlet robe on him, and then twisted together a crown of thorns and set it on his head. They put a staff in his right hand. Then they knelt in front of him and mocked him. “Hail, king of the Jews!” they said.

    Matthew 27:28-29
    NIV: They stripped him and put a scarlet robe on him, and then twisted together a crown of thorns and set it on his head. They put a staff in his right hand. Then they knelt in front of him and mocked him. “Hail, king of the Jews!” they said. Matthew 27:28-29
    Love
    1
    0 Σχόλια 0 Μοιράστηκε 4χλμ. Views 0 Προεπισκόπηση
  • ESV:

    But from the beginning of creation, ‘God made them male and female.’ ‘Therefore a man shall leave his father and mother and hold fast to his wife, and the two shall become one flesh.’ So they are no longer two but one flesh. What therefore God has joined together, let not man separate.

    Mark 10:6-9

    ESV: But from the beginning of creation, ‘God made them male and female.’ ‘Therefore a man shall leave his father and mother and hold fast to his wife, and the two shall become one flesh.’ So they are no longer two but one flesh. What therefore God has joined together, let not man separate. Mark 10:6-9
    Love
    1
    0 Σχόλια 0 Μοιράστηκε 2χλμ. Views 0 Προεπισκόπηση
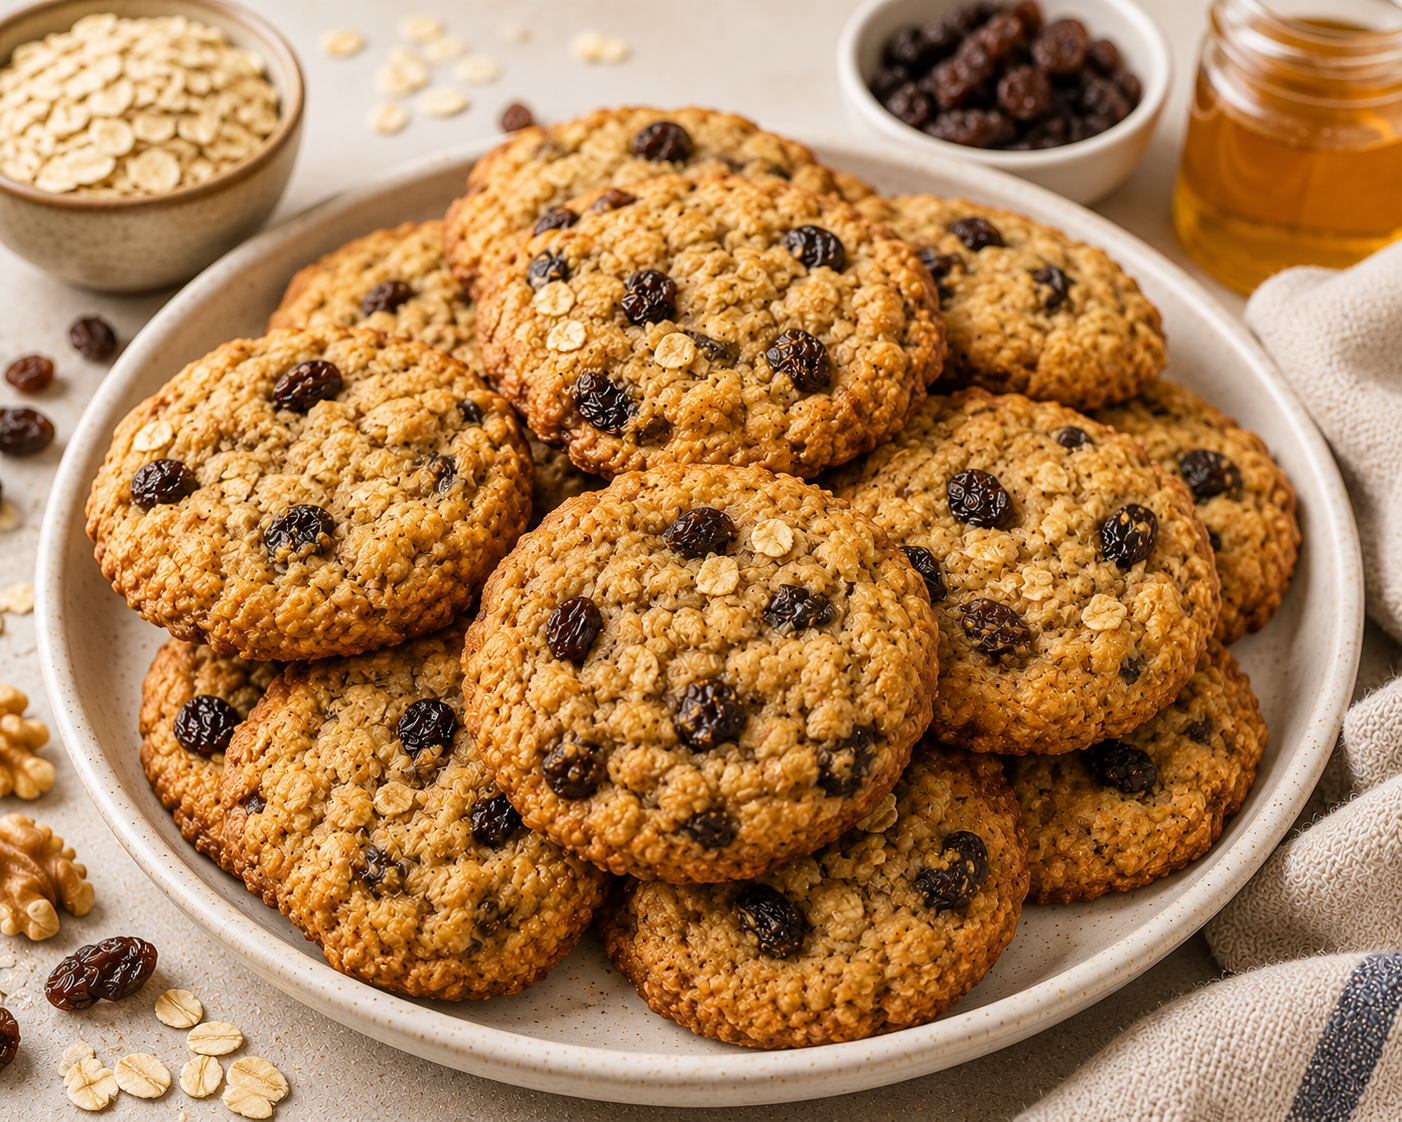
  • Healthy Oatmeal Raisin Cookies


    Category: Healthy Snacks & Treats

    Labels: V • DF Option • GF Option • EF Option • Family-Friendly

    Yield: 16–18 cookies

    Prep Time: 15 minutes

    Bake Time: 10–12 minutes

    Total Time: About 30 minutes


    Description


    Soft, chewy, and packed with hearty oats and naturally sweet raisins, these Healthy Oatmeal Raisin Cookies are a satisfying snack for any time of day. Made with simple ingredients and lightly sweetened, they offer a comforting homemade flavor with a tender texture and hints of cinnamon in every bite. Perfect for lunchboxes, afternoon snacks, or sharing with family and friends, these cookies are both wholesome and delicious.


    Ingredients


    1. 1 cup (90g) rolled oats
    2. ¾ cup (90g) whole wheat flour
    3. 1 teaspoon ground cinnamon
    4. ½ teaspoon baking soda
    5. ¼ teaspoon fine salt
    6. ⅓ cup (80ml) melted coconut oil or melted butter
    7. ⅓ cup (80ml) honey or maple syrup
    8. 1 large egg
    9. 1 teaspoon vanilla extract
    10. ½ cup (75g) raisins
    11. Optional: 2 tablespoons chopped walnuts or pecans


    Method


    1. Preheat the oven to 180°C (350°F). Line a baking tray with parchment paper or lightly grease it.
    2. In a medium bowl, whisk together the oats, flour, cinnamon, baking soda, and salt.
    3. In a separate bowl, whisk together the melted coconut oil (or butter), honey (or maple syrup), egg, and vanilla extract until smooth.
    4. Add the wet ingredients to the dry ingredients and stir until combined.
    5. Fold in the raisins and optional nuts.
    6. Let the mixture rest for 5 minutes so the oats can absorb some moisture.
    7. Scoop tablespoon-sized portions of dough onto the prepared baking tray, spacing them about 5 cm (2 inches) apart. Gently flatten each cookie slightly with the back of a spoon.
    8. Bake for 10–12 minutes, or until:
    9. The edges are lightly golden.
    10. The centers appear set.
    11. The internal temperature reaches approximately 88–93°C (190–200°F).
    12. Allow the cookies to cool on the baking tray for 5 minutes before transferring them to a wire rack to cool completely.


    Healthy Snack Options


    1. V (Vegetarian): Contains no meat products.
    2. DF (Dairy-Free Option): Use coconut oil instead of butter.
    3. GF (Gluten-Free Option): Use certified gluten-free oats and a gluten-free flour blend.
    4. EF (Egg-Free Option): Replace the egg with 1 flax egg (1 tbsp ground flaxseed + 3 tbsp water, rested 5 minutes).
    5. Family-Friendly: Soft texture and mild sweetness make these cookies suitable for all ages.


    Storage


    1. Room temperature (airtight container): up to 4 days
    2. Refrigerated: up to 1 week
    3. Frozen (sealed container or freezer bag): up to 3 months

    Allow cookies to cool completely before storing to maintain their texture.


    Daily Delights Tip


    For extra plump and juicy raisins, soak them in warm water for 5–10 minutes, then drain and pat dry before adding them to the dough. This helps keep the cookies soft and moist after baking.

    Healthy Oatmeal Raisin CookiesCategory: Healthy Snacks & TreatsLabels: V • DF Option • GF Option • EF Option • Family-FriendlyYield: 16–18 cookiesPrep Time: 15 minutesBake Time: 10–12 minutesTotal Time: About 30 minutesDescriptionSoft, chewy, and packed with hearty oats and naturally sweet raisins, these Healthy Oatmeal Raisin Cookies are a satisfying snack for any time of day. Made with simple ingredients and lightly sweetened, they offer a comforting homemade flavor with a tender texture and hints of cinnamon in every bite. Perfect for lunchboxes, afternoon snacks, or sharing with family and friends, these cookies are both wholesome and delicious.Ingredients1 cup (90g) rolled oats¾ cup (90g) whole wheat flour1 teaspoon ground cinnamon½ teaspoon baking soda¼ teaspoon fine salt⅓ cup (80ml) melted coconut oil or melted butter⅓ cup (80ml) honey or maple syrup1 large egg1 teaspoon vanilla extract½ cup (75g) raisinsOptional: 2 tablespoons chopped walnuts or pecansMethodPreheat the oven to 180°C (350°F). Line a baking tray with parchment paper or lightly grease it.In a medium bowl, whisk together the oats, flour, cinnamon, baking soda, and salt.In a separate bowl, whisk together the melted coconut oil (or butter), honey (or maple syrup), egg, and vanilla extract until smooth.Add the wet ingredients to the dry ingredients and stir until combined.Fold in the raisins and optional nuts.Let the mixture rest for 5 minutes so the oats can absorb some moisture.Scoop tablespoon-sized portions of dough onto the prepared baking tray, spacing them about 5 cm (2 inches) apart. Gently flatten each cookie slightly with the back of a spoon.Bake for 10–12 minutes, or until:The edges are lightly golden.The centers appear set.The internal temperature reaches approximately 88–93°C (190–200°F).Allow the cookies to cool on the baking tray for 5 minutes before transferring them to a wire rack to cool completely.Healthy Snack OptionsV (Vegetarian): Contains no meat products.DF (Dairy-Free Option): Use coconut oil instead of butter.GF (Gluten-Free Option): Use certified gluten-free oats and a gluten-free flour blend.EF (Egg-Free Option): Replace the egg with 1 flax egg (1 tbsp ground flaxseed + 3 tbsp water, rested 5 minutes).Family-Friendly: Soft texture and mild sweetness make these cookies suitable for all ages.StorageRoom temperature (airtight container): up to 4 daysRefrigerated: up to 1 weekFrozen (sealed container or freezer bag): up to 3 monthsAllow cookies to cool completely before storing to maintain their texture.Daily Delights TipFor extra plump and juicy raisins, soak them in warm water for 5–10 minutes, then drain and pat dry before adding them to the dough. This helps keep the cookies soft and moist after baking.
    0 Σχόλια 0 Μοιράστηκε 4χλμ. Views 0 Προεπισκόπηση
  • NKJV:

    Now I plead with you, brethren, by the name of our Lord Jesus Christ, that you all speak the same thing, and that there be no divisions among you, but that you be perfectly joined together in the same mind and in the same judgment.

    1 Corinthians 1:10
    NKJV: Now I plead with you, brethren, by the name of our Lord Jesus Christ, that you all speak the same thing, and that there be no divisions among you, but that you be perfectly joined together in the same mind and in the same judgment. 1 Corinthians 1:10
    Love
    1
    0 Σχόλια 0 Μοιράστηκε 2χλμ. Views 0 Προεπισκόπηση
  • Spinach & Cheese Egg Muffin Cups


    Category: Healthy Breakfasts

    Labels: V • GF • Low-Carb • Meal-Prep Friendly • Family-Friendly

    Yield: 12 egg muffin cups

    Prep Time: 10 minutes

    Bake Time: 18–22 minutes

    Total Time: About 30–35 minutes


    Description


    Light, fluffy, and packed with savory flavor, these Spinach & Cheese Egg Muffin Cups are a simple breakfast that’s perfect for busy mornings. Made with eggs, spinach, and cheese, they bake into tender, protein-rich bites that are easy to prepare ahead of time. Whether enjoyed fresh from the oven or reheated during the week, these muffin cups make a convenient and satisfying breakfast for the whole family.


    Ingredients


    1. 8 large eggs
    2. ¼ cup (60ml) milk of choice
    3. 1 cup (30g) fresh spinach, finely chopped
    4. ¾ cup (85g) shredded cheddar cheese
    5. ¼ teaspoon fine salt
    6. ¼ teaspoon black pepper
    7. ¼ teaspoon garlic powder (optional)
    8. 1 tablespoon finely chopped chives or parsley (optional)
    9. Non-stick cooking spray or a small amount of oil for greasing


    Optional add-ins:


    1. Diced bell peppers
    2. Chopped mushrooms
    3. Diced tomatoes (seeds removed)
    4. Finely chopped onion
    5. Crumbled feta cheese


    Method


    1. Preheat the oven to 180°C (350°F). Lightly grease a 12-cup muffin tin or line with silicone muffin liners.
    2. In a large mixing bowl, whisk together the eggs and milk until smooth and well combined.
    3. Stir in the spinach, shredded cheese, salt, pepper, garlic powder, and any optional herbs.
    4. Divide the mixture evenly among the prepared muffin cups, filling each about three-quarters full.
    5. Bake for 18–22 minutes, or until:
    6. The centers are set and no longer jiggly.
    7. The tops are lightly golden.
    8. The internal temperature reaches 71°C (160°F) or higher.
    9. Remove from the oven and allow the muffin cups to cool in the pan for 5 minutes.
    10. Carefully loosen the edges and transfer to a wire rack or serving plate.
    11. Serve warm or allow to cool completely for meal prep storage.


    Healthy Breakfast Options


    1. V (Vegetarian): Contains no meat products.
    2. GF (Gluten-Free): Naturally gluten-free when prepared with gluten-free ingredients.
    3. Low-Carb: Lower in carbohydrates than many traditional breakfast options.
    4. Meal-Prep Friendly: Easy to prepare ahead and reheat throughout the week.
    5. Family-Friendly: Mild flavors and soft texture make these suitable for both children and adults.


    Storage


    1. Refrigerated (airtight container): up to 4 days
    2. Frozen (sealed freezer-safe container or freezer bag): up to 2 months

    Reheat in the microwave for 20–30 seconds or warm in a low oven until heated through.


    Daily Delights Tip


    To prevent excess moisture, pat the chopped spinach dry before mixing it into the eggs. If adding vegetables such as mushrooms or onions, sauté them briefly first to remove excess water and help keep the egg muffin cups fluffy.

    Spinach & Cheese Egg Muffin CupsCategory: Healthy BreakfastsLabels: V • GF • Low-Carb • Meal-Prep Friendly • Family-FriendlyYield: 12 egg muffin cupsPrep Time: 10 minutesBake Time: 18–22 minutesTotal Time: About 30–35 minutesDescriptionLight, fluffy, and packed with savory flavor, these Spinach & Cheese Egg Muffin Cups are a simple breakfast that’s perfect for busy mornings. Made with eggs, spinach, and cheese, they bake into tender, protein-rich bites that are easy to prepare ahead of time. Whether enjoyed fresh from the oven or reheated during the week, these muffin cups make a convenient and satisfying breakfast for the whole family.Ingredients8 large eggs¼ cup (60ml) milk of choice1 cup (30g) fresh spinach, finely chopped¾ cup (85g) shredded cheddar cheese¼ teaspoon fine salt¼ teaspoon black pepper¼ teaspoon garlic powder (optional)1 tablespoon finely chopped chives or parsley (optional)Non-stick cooking spray or a small amount of oil for greasingOptional add-ins:Diced bell peppersChopped mushroomsDiced tomatoes (seeds removed)Finely chopped onionCrumbled feta cheeseMethodPreheat the oven to 180°C (350°F). Lightly grease a 12-cup muffin tin or line with silicone muffin liners.In a large mixing bowl, whisk together the eggs and milk until smooth and well combined.Stir in the spinach, shredded cheese, salt, pepper, garlic powder, and any optional herbs.Divide the mixture evenly among the prepared muffin cups, filling each about three-quarters full.Bake for 18–22 minutes, or until:The centers are set and no longer jiggly.The tops are lightly golden.The internal temperature reaches 71°C (160°F) or higher.Remove from the oven and allow the muffin cups to cool in the pan for 5 minutes.Carefully loosen the edges and transfer to a wire rack or serving plate.Serve warm or allow to cool completely for meal prep storage.Healthy Breakfast OptionsV (Vegetarian): Contains no meat products.GF (Gluten-Free): Naturally gluten-free when prepared with gluten-free ingredients.Low-Carb: Lower in carbohydrates than many traditional breakfast options.Meal-Prep Friendly: Easy to prepare ahead and reheat throughout the week.Family-Friendly: Mild flavors and soft texture make these suitable for both children and adults.StorageRefrigerated (airtight container): up to 4 daysFrozen (sealed freezer-safe container or freezer bag): up to 2 monthsReheat in the microwave for 20–30 seconds or warm in a low oven until heated through.Daily Delights TipTo prevent excess moisture, pat the chopped spinach dry before mixing it into the eggs. If adding vegetables such as mushrooms or onions, sauté them briefly first to remove excess water and help keep the egg muffin cups fluffy.
    Love
    1
    0 Σχόλια 0 Μοιράστηκε 4χλμ. Views 0 Προεπισκόπηση
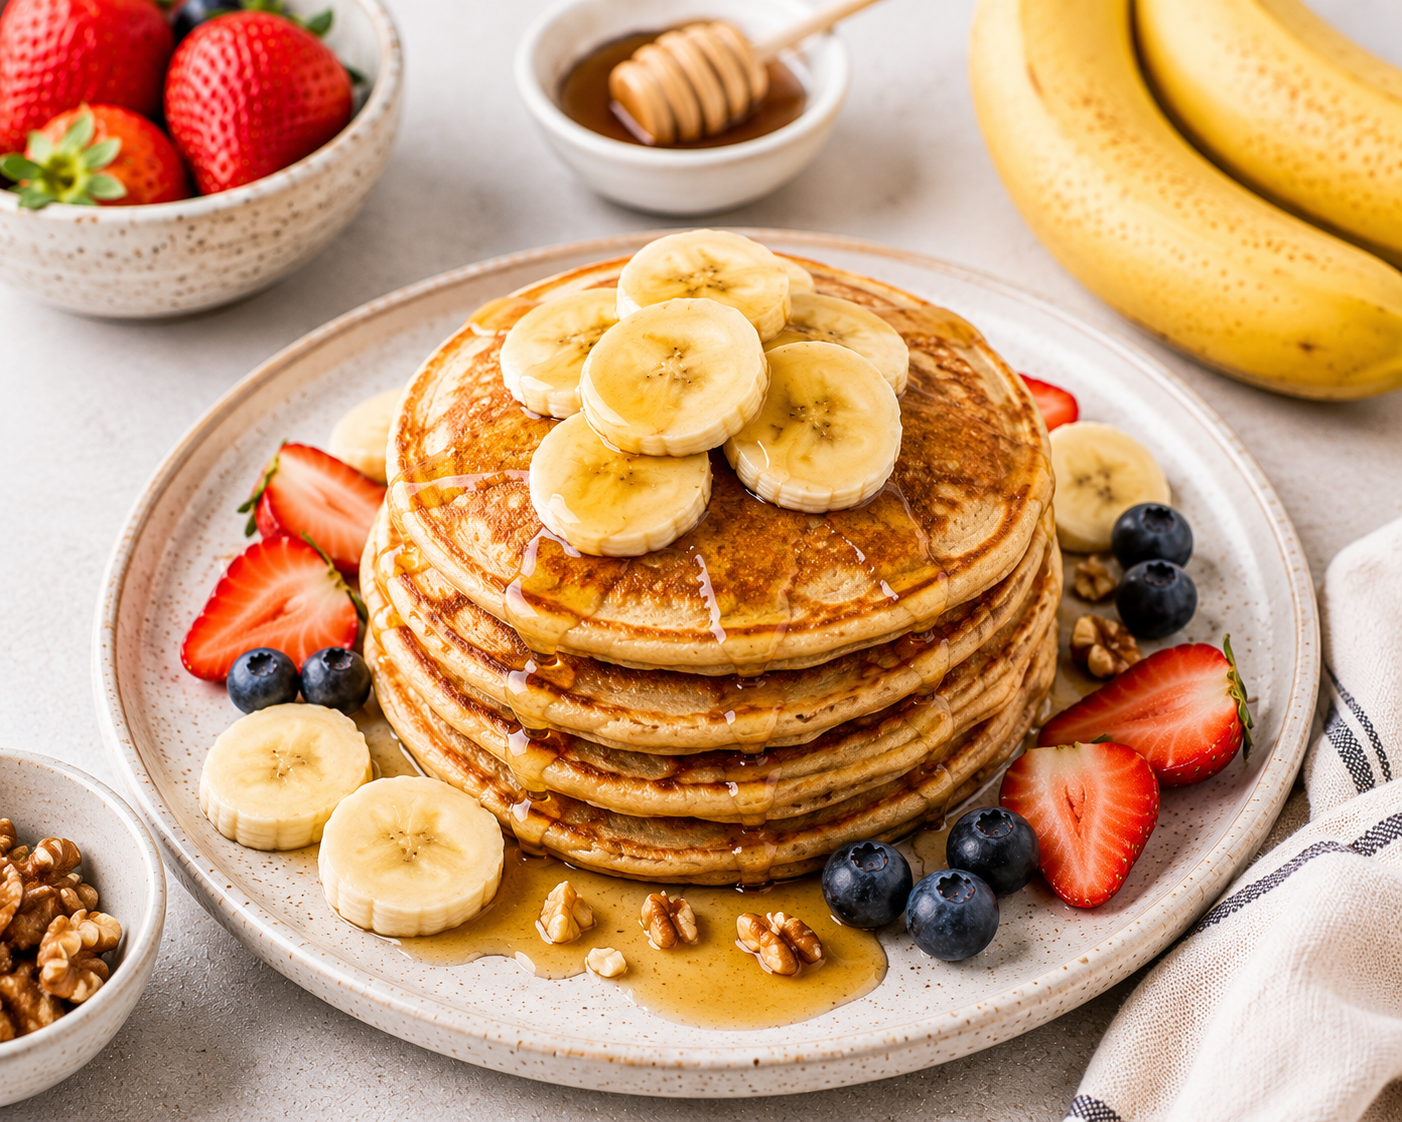
  • Healthy Banana Pancakes


    Category: Healthy Breakfasts

    Labels: V • DF Option • GF Option • EF Option • Family-Friendly

    Yield: 8–10 small pancakes (about 2–3 servings)

    Prep Time: 10 minutes

    Cook Time: 10–12 minutes

    Total Time: About 20–25 minutes


    Description


    Soft, fluffy, and naturally sweetened with ripe banana, these Healthy Banana Pancakes are a delicious breakfast option for busy mornings or relaxed weekend brunches. Made with wholesome ingredients and simple pantry staples, they offer a tender texture and warm banana flavor in every bite. Easy to prepare and family-friendly, these pancakes pair beautifully with fresh fruit, yogurt, nut butter, or a drizzle of maple syrup.


    Ingredients


    1. 1 medium ripe banana (about 100–120g), mashed
    2. 1 cup (120g) all-purpose flour
    3. 1 teaspoon baking powder
    4. ½ teaspoon ground cinnamon
    5. ¼ teaspoon fine salt
    6. 1 large egg
    7. ¾ cup (180ml) milk of choice
    8. 1 teaspoon vanilla extract
    9. 1 tablespoon maple syrup or honey (optional)
    10. 1 tablespoon melted butter or neutral oil, plus extra for cooking


    Optional toppings:


    1. Sliced banana
    2. Fresh berries
    3. Greek yogurt or dairy-free yogurt
    4. Peanut butter or almond butter
    5. Maple syrup
    6. Chopped nuts


    Method


    1. In a medium bowl, whisk together the flour, baking powder, cinnamon, and salt.
    2. In a separate bowl, mash the banana until mostly smooth. Whisk in the egg, milk, vanilla extract, maple syrup or honey (if using), and melted butter or oil.
    3. Pour the wet ingredients into the dry ingredients and stir gently until just combined. A few small lumps are fine; avoid overmixing.
    4. Heat a lightly greased non-stick pan or griddle over medium-low heat.
    5. Scoop about 2 tablespoons of batter per pancake into the pan, leaving space between each pancake.
    6. Cook for 2–3 minutes, or until small bubbles appear on the surface and the edges begin to look set.
    7. Flip carefully and cook for another 1–2 minutes until golden brown and cooked through. Internal temperature should reach approximately 93–96°C (200–205°F).
    8. Repeat with the remaining batter, adding more oil or butter to the pan as needed.
    9. Serve warm with your favorite toppings.


    Healthy Breakfast Options


    1. V (Vegetarian): Contains no meat products.
    2. DF (Dairy-Free Option): Use plant-based milk and oil instead of butter.
    3. GF (Gluten-Free Option): Use a gluten-free all-purpose flour blend.
    4. EF (Egg-Free Option): Replace the egg with 1 flax egg (1 tbsp ground flaxseed + 3 tbsp water, rested 5 minutes).
    5. Family-Friendly: Soft texture and naturally sweet banana flavor make these pancakes enjoyable for both children and adults.


    Storage


    1. Refrigerated (airtight container): up to 3 days
    2. Frozen (layered between parchment paper in a sealed container or freezer bag): up to 2 months

    Reheat in a toaster, microwave, or skillet until warmed through.


    Daily Delights Tip


    Use a ripe banana with brown speckles for the best sweetness and flavor. If the batter thickens while resting, stir in a small splash of milk to keep the pancakes soft and fluffy.

    Healthy Banana PancakesCategory: Healthy BreakfastsLabels: V • DF Option • GF Option • EF Option • Family-FriendlyYield: 8–10 small pancakes (about 2–3 servings)Prep Time: 10 minutesCook Time: 10–12 minutesTotal Time: About 20–25 minutesDescriptionSoft, fluffy, and naturally sweetened with ripe banana, these Healthy Banana Pancakes are a delicious breakfast option for busy mornings or relaxed weekend brunches. Made with wholesome ingredients and simple pantry staples, they offer a tender texture and warm banana flavor in every bite. Easy to prepare and family-friendly, these pancakes pair beautifully with fresh fruit, yogurt, nut butter, or a drizzle of maple syrup.Ingredients1 medium ripe banana (about 100–120g), mashed1 cup (120g) all-purpose flour1 teaspoon baking powder½ teaspoon ground cinnamon¼ teaspoon fine salt1 large egg¾ cup (180ml) milk of choice1 teaspoon vanilla extract1 tablespoon maple syrup or honey (optional)1 tablespoon melted butter or neutral oil, plus extra for cookingOptional toppings:Sliced bananaFresh berriesGreek yogurt or dairy-free yogurtPeanut butter or almond butterMaple syrupChopped nutsMethodIn a medium bowl, whisk together the flour, baking powder, cinnamon, and salt.In a separate bowl, mash the banana until mostly smooth. Whisk in the egg, milk, vanilla extract, maple syrup or honey (if using), and melted butter or oil.Pour the wet ingredients into the dry ingredients and stir gently until just combined. A few small lumps are fine; avoid overmixing.Heat a lightly greased non-stick pan or griddle over medium-low heat.Scoop about 2 tablespoons of batter per pancake into the pan, leaving space between each pancake.Cook for 2–3 minutes, or until small bubbles appear on the surface and the edges begin to look set.Flip carefully and cook for another 1–2 minutes until golden brown and cooked through. Internal temperature should reach approximately 93–96°C (200–205°F).Repeat with the remaining batter, adding more oil or butter to the pan as needed.Serve warm with your favorite toppings.Healthy Breakfast OptionsV (Vegetarian): Contains no meat products.DF (Dairy-Free Option): Use plant-based milk and oil instead of butter.GF (Gluten-Free Option): Use a gluten-free all-purpose flour blend.EF (Egg-Free Option): Replace the egg with 1 flax egg (1 tbsp ground flaxseed + 3 tbsp water, rested 5 minutes).Family-Friendly: Soft texture and naturally sweet banana flavor make these pancakes enjoyable for both children and adults.StorageRefrigerated (airtight container): up to 3 daysFrozen (layered between parchment paper in a sealed container or freezer bag): up to 2 monthsReheat in a toaster, microwave, or skillet until warmed through.Daily Delights TipUse a ripe banana with brown speckles for the best sweetness and flavor. If the batter thickens while resting, stir in a small splash of milk to keep the pancakes soft and fluffy.
    Love
    1
    0 Σχόλια 0 Μοιράστηκε 4χλμ. Views 0 Προεπισκόπηση
  • Strawberry Yogurt Breakfast Parfaits


    Category: Healthy Breakfasts

    Labels: V • GF Option • DF Option • EF • Family-Friendly

    Yield: 2–3 servings

    Prep Time: 10 minutes

    Chill Time: Optional 15–20 minutes

    Total Time: About 10 minutes


    Description


    Fresh, creamy, and naturally sweet, these Strawberry Yogurt Breakfast Parfaits are a quick and satisfying way to start the day. Layers of juicy strawberries, smooth yogurt, and crunchy granola come together to create a delicious balance of texture and flavor in every spoonful. Easy to customize and simple to prepare, these parfaits are ideal for busy mornings, healthy snacks, brunch spreads, or make-ahead breakfasts.


    Ingredients


    .2 cups (300g) fresh strawberries, washed and sliced

    .1½ cups (360g) plain or vanilla yogurt of choice

    .1–2 teaspoons honey or maple syrup (optional, depending on sweetness preference)

    .½ teaspoon vanilla extract

    .¾ cup (60–75g) granola

    .Optional: 1 tablespoon chia seeds or ground flaxseed


    Optional toppings:


    .Extra sliced strawberries

    .Fresh blueberries or raspberries

    .Chopped nuts

    .Shredded coconut

    .Mint leaves

    .Extra drizzle of honey or maple syrup


    Method


    1.In a small bowl, stir together the yogurt, vanilla extract, and honey or maple syrup if using.

    2.Prepare 2–3 glasses, jars, or serving bowls.

    3.Add a spoonful of yogurt to the bottom of each container.

    4.Layer with sliced strawberries, followed by a layer of granola.

    5.Repeat the layers until the containers are filled, finishing with yogurt, strawberries, and a sprinkle of granola on top.

    6.Add any optional toppings as desired.

    7.Serve immediately for maximum crunch, or chill briefly before serving.


    Healthy Breakfast Options


    .V (Vegetarian): Contains no meat products.

    .GF (Gluten-Free Option): Use certified gluten-free granola.

    .DF (Dairy-Free Option): Use dairy-free yogurt and maple syrup if desired.

    .EF (Egg-Free): Naturally egg-free recipe.

    .Family-Friendly: Creamy yogurt, sweet berries, and crunchy granola make this breakfast enjoyable for both kids and adults.


    Storage


    .Refrigerated (assembled, covered): up to 24 hours

    .Refrigerated (ingredients stored separately): up to 3 days

    For the best texture, store granola separately and add just before serving to keep it crisp.


    Daily Delights Tip


    For extra flavor, lightly mash a few strawberries with a fork and spoon them between the layers — this creates a naturally fruity “strawberry sauce” without needing added sugar.

    Strawberry Yogurt Breakfast ParfaitsCategory: Healthy BreakfastsLabels: V • GF Option • DF Option • EF • Family-FriendlyYield: 2–3 servingsPrep Time: 10 minutesChill Time: Optional 15–20 minutesTotal Time: About 10 minutesDescriptionFresh, creamy, and naturally sweet, these Strawberry Yogurt Breakfast Parfaits are a quick and satisfying way to start the day. Layers of juicy strawberries, smooth yogurt, and crunchy granola come together to create a delicious balance of texture and flavor in every spoonful. Easy to customize and simple to prepare, these parfaits are ideal for busy mornings, healthy snacks, brunch spreads, or make-ahead breakfasts.Ingredients.2 cups (300g) fresh strawberries, washed and sliced.1½ cups (360g) plain or vanilla yogurt of choice.1–2 teaspoons honey or maple syrup (optional, depending on sweetness preference).½ teaspoon vanilla extract.¾ cup (60–75g) granola.Optional: 1 tablespoon chia seeds or ground flaxseedOptional toppings:.Extra sliced strawberries.Fresh blueberries or raspberries.Chopped nuts.Shredded coconut.Mint leaves.Extra drizzle of honey or maple syrupMethod1.In a small bowl, stir together the yogurt, vanilla extract, and honey or maple syrup if using.2.Prepare 2–3 glasses, jars, or serving bowls.3.Add a spoonful of yogurt to the bottom of each container.4.Layer with sliced strawberries, followed by a layer of granola.5.Repeat the layers until the containers are filled, finishing with yogurt, strawberries, and a sprinkle of granola on top.6.Add any optional toppings as desired.7.Serve immediately for maximum crunch, or chill briefly before serving.Healthy Breakfast Options.V (Vegetarian): Contains no meat products..GF (Gluten-Free Option): Use certified gluten-free granola..DF (Dairy-Free Option): Use dairy-free yogurt and maple syrup if desired..EF (Egg-Free): Naturally egg-free recipe..Family-Friendly: Creamy yogurt, sweet berries, and crunchy granola make this breakfast enjoyable for both kids and adults.Storage.Refrigerated (assembled, covered): up to 24 hours.Refrigerated (ingredients stored separately): up to 3 daysFor the best texture, store granola separately and add just before serving to keep it crisp.Daily Delights TipFor extra flavor, lightly mash a few strawberries with a fork and spoon them between the layers — this creates a naturally fruity “strawberry sauce” without needing added sugar.
    Love
    1
    0 Σχόλια 0 Μοιράστηκε 3χλμ. Views 0 Προεπισκόπηση
  • Healthy Blueberry Oat Muffins


    Category: Healthy Bakes

    Labels: V • DF Option • GF Option • EF Option • Family-Friendly

    Yield: 12 muffins

    Prep Time: 10 minutes

    Bake Time: 18–22 minutes

    Total Time: About 35 minutes


    Description

    Soft, wholesome, and bursting with juicy blueberries, these Healthy Blueberry Oat Muffins are a delicious choice for breakfast, snacks, or lunchboxes. Made with oats, simple pantry ingredients, and natural sweetness, they offer a tender texture with fruity flavor in every bite.Easy to prepare and family-friendly, these muffins are perfect for busy mornings, afternoon snacks, or make-ahead treats.


    Ingredients


    .1 cup (90g) rolled oats

    .1 cup (120g) all-purpose flour

    .½ cup (60g) whole wheat flour (or additional all-purpose flour)

    .1 teaspoon baking powder

    .½ teaspoon baking soda

    .½ teaspoon ground cinnamon

    .¼ teaspoon fine salt

    .2 large eggs

    .⅓ cup (80ml) honey or maple syrup

    .⅓ cup (80ml) melted coconut oil or melted butter

    .½ cup (120ml) milk of choice

    .1 teaspoon vanilla extract

    .1 cup (150g) fresh or frozen blueberries

    Optional add-ins:

    .1 tablespoon chia seeds

    .2 tablespoons chopped nuts

    .1 tablespoon rolled oats for topping


    Method

    1. Preheat oven to 180°C (350°F). Line a 12-cup muffin tray with paper liners or lightly grease the muffin cups.

    2. In a large bowl, combine rolled oats, flour, baking powder, baking soda, cinnamon, and salt.

    3. In a separate bowl, whisk together eggs, honey (or maple syrup), melted coconut oil (or butter), milk, and vanilla extract until smooth.

    4. Pour the wet ingredients into the dry ingredients and stir gently until just combined.

    5. Fold in the blueberries and any optional add-ins if using. Avoid overmixing.

    6. Divide the batter evenly among the prepared muffin cups, filling each about ¾ full. Sprinkle extra oats on top if desired.

    7. Bake for 18–22 minutes, or until:.A toothpick inserted into the center comes out clean.The tops are lightly golden.Internal temperature reaches about 95–98°C (203–208°F)

    8. Allow the muffins to cool in the pan for 5–10 minutes, then transfer to a wire rack to cool completely.


    Healthy Bakes Options

    .V (Vegetarian): Contains no meat products.

    .DF (Dairy-Free Option): Use coconut oil and plant-based milk.

    .GF (Gluten-Free Option): Use certified gluten-free oats and a gluten-free all-purpose flour blend.

    .EF (Egg-Free Option): Replace eggs with 2 flax eggs (2 tbsp ground flaxseed + 6 tbsp water, rested 5 minutes).

    .Family-Friendly: Soft texture, mild sweetness, and fruity flavor make these muffins suitable for all ages.


    Storage

    .Room temperature (airtight container): up to 2–3 days

    .Refrigerated: up to 5–6 days

    .Frozen (stored in a sealed container or freezer bag): up to 3 months

    Allow muffins to cool completely before storing to maintain the best texture and freshness.


    Daily Delights Tip

    For extra juicy muffins, toss the blueberries lightly in a teaspoon of flour before folding them into the batter —this helps prevent them from sinking to the bottom during baking.

    Healthy Blueberry Oat MuffinsCategory: Healthy Bakes Labels: V • DF Option • GF Option • EF Option • Family-Friendly Yield: 12 muffins Prep Time: 10 minutes Bake Time: 18–22 minutes Total Time: About 35 minutesDescriptionSoft, wholesome, and bursting with juicy blueberries, these Healthy Blueberry Oat Muffins are a delicious choice for breakfast, snacks, or lunchboxes. Made with oats, simple pantry ingredients, and natural sweetness, they offer a tender texture with fruity flavor in every bite.Easy to prepare and family-friendly, these muffins are perfect for busy mornings, afternoon snacks, or make-ahead treats.Ingredients.1 cup (90g) rolled oats.1 cup (120g) all-purpose flour.½ cup (60g) whole wheat flour (or additional all-purpose flour).1 teaspoon baking powder.½ teaspoon baking soda.½ teaspoon ground cinnamon.¼ teaspoon fine salt.2 large eggs.⅓ cup (80ml) honey or maple syrup.⅓ cup (80ml) melted coconut oil or melted butter.½ cup (120ml) milk of choice.1 teaspoon vanilla extract.1 cup (150g) fresh or frozen blueberriesOptional add-ins:.1 tablespoon chia seeds.2 tablespoons chopped nuts.1 tablespoon rolled oats for toppingMethod1. Preheat oven to 180°C (350°F). Line a 12-cup muffin tray with paper liners or lightly grease the muffin cups.2. In a large bowl, combine rolled oats, flour, baking powder, baking soda, cinnamon, and salt.3. In a separate bowl, whisk together eggs, honey (or maple syrup), melted coconut oil (or butter), milk, and vanilla extract until smooth.4. Pour the wet ingredients into the dry ingredients and stir gently until just combined.5. Fold in the blueberries and any optional add-ins if using. Avoid overmixing.6. Divide the batter evenly among the prepared muffin cups, filling each about ¾ full. Sprinkle extra oats on top if desired.7. Bake for 18–22 minutes, or until:.A toothpick inserted into the center comes out clean.The tops are lightly golden.Internal temperature reaches about 95–98°C (203–208°F)8. Allow the muffins to cool in the pan for 5–10 minutes, then transfer to a wire rack to cool completely.Healthy Bakes Options.V (Vegetarian): Contains no meat products..DF (Dairy-Free Option): Use coconut oil and plant-based milk..GF (Gluten-Free Option): Use certified gluten-free oats and a gluten-free all-purpose flour blend..EF (Egg-Free Option): Replace eggs with 2 flax eggs (2 tbsp ground flaxseed + 6 tbsp water, rested 5 minutes)..Family-Friendly: Soft texture, mild sweetness, and fruity flavor make these muffins suitable for all ages.Storage.Room temperature (airtight container): up to 2–3 days.Refrigerated: up to 5–6 days.Frozen (stored in a sealed container or freezer bag): up to 3 monthsAllow muffins to cool completely before storing to maintain the best texture and freshness.Daily Delights TipFor extra juicy muffins, toss the blueberries lightly in a teaspoon of flour before folding them into the batter —this helps prevent them from sinking to the bottom during baking.
    Love
    1
    0 Σχόλια 0 Μοιράστηκε 3χλμ. Views 0 Προεπισκόπηση
  • ESV:

    And day by day, attending the temple together and breaking bread in their homes, they received their food with glad and generous hearts, praising God and having favor with all the people. And the Lord added to their number day by day those who were being saved.

    Acts 2:46-47
    ESV: And day by day, attending the temple together and breaking bread in their homes, they received their food with glad and generous hearts, praising God and having favor with all the people. And the Lord added to their number day by day those who were being saved. Acts 2:46-47
    Love
    1
    0 Σχόλια 0 Μοιράστηκε 2χλμ. Views 0 Προεπισκόπηση
  • Healthy Banana Bread

    Category: Healthy Bakes
    Labels: V • DF Option • GF Option • EF Option • Family-Friendly
    Yield: 1 loaf (8–10 slices)
    Prep Time: 10 minutes
    Bake Time: 45–55 minutes
    Total Time: About 1 hour 5 minutes

    Description

    Moist, naturally sweet, and full of rich banana flavor, this Healthy Banana Bread is a wholesome twist on a classic favorite. Made with simple ingredients and ripe bananas, it delivers a soft texture with just the right amount of sweetness.

    Perfect for breakfast, snacks, or a comforting treat, this loaf is easy to make and ideal for using up overripe bananas.

    Ingredients

    .3 medium ripe bananas, mashed

    .2 large eggs

    .¼ cup (60ml) honey or maple syrup

    .¼ cup (60ml) melted butter or coconut oil

    .¼ cup (60ml) milk of choice

    .1 teaspoon vanilla extract

    .1½ cups (180g) all-purpose flour

    .½ cup (60g) whole wheat flour (or additional all-purpose flour)

    .1 teaspoon baking soda

    .½ teaspoon ground cinnamon

    .¼ teaspoon fine salt

    Optional add-ins:

    .¼ cup (40g) chocolate chips

    .¼ cup chopped nuts

    Method

    1. Preheat oven to 175°C (350°F). Lightly grease or line a loaf pan.

    2. In a large bowl, mash the bananas until smooth.

    3. Add eggs, honey (or maple syrup), melted butter (or coconut oil), milk, and vanilla. Mix until well combined.

    4. In a separate bowl, whisk together flour, baking soda, cinnamon, and salt.

    5. Add the dry ingredients to the wet ingredients and stir gently until just combined. Do not overmix.

    6. Fold in optional add-ins if using.

    7. Pour batter into the prepared loaf pan and smooth the top.

    8. Bake for 45–55 minutes, or until:

    .A toothpick inserted into the center comes out clean

    .The top is golden brown

    .Internal temperature reaches about 96–98°C (205–208°F)

    9. Allow the bread to cool in the pan for 10 minutes, then transfer to a wire rack to cool completely.

    Healthy Bakes Options

    .V (Vegetarian): Contains no meat products.

    .DF (Dairy-Free Option): Use coconut oil and plant-based milk.

    .GF (Gluten-Free Option): Use a gluten-free all-purpose flour blend with xanthan gum.

    .EF(Egg-Free Option): Replace eggs with 2 flax eggs (2 tbsp ground flaxseed + 6 tbsp water, rested 5 minutes).

    .Family-Friendly: Soft texture and natural sweetness make it perfect for all ages.

    Storage

    .Room temperature (airtight container): up to 3 days

    .Refrigerated: up to 5–6 days

    .Frozen (sliced and wrapped well): up to 3 months

    Ensure the loaf is fully cooled before storing to prevent excess moisture.

    Daily Delights Tip

    For extra moisture and flavor, use very ripe bananas with brown spots—they provide natural sweetness and the best texture.
    Healthy Banana Bread Category: Healthy Bakes Labels: V • DF Option • GF Option • EF Option • Family-Friendly Yield: 1 loaf (8–10 slices) Prep Time: 10 minutes Bake Time: 45–55 minutes Total Time: About 1 hour 5 minutes Description Moist, naturally sweet, and full of rich banana flavor, this Healthy Banana Bread is a wholesome twist on a classic favorite. Made with simple ingredients and ripe bananas, it delivers a soft texture with just the right amount of sweetness. Perfect for breakfast, snacks, or a comforting treat, this loaf is easy to make and ideal for using up overripe bananas. Ingredients .3 medium ripe bananas, mashed .2 large eggs .¼ cup (60ml) honey or maple syrup .¼ cup (60ml) melted butter or coconut oil .¼ cup (60ml) milk of choice .1 teaspoon vanilla extract .1½ cups (180g) all-purpose flour .½ cup (60g) whole wheat flour (or additional all-purpose flour) .1 teaspoon baking soda .½ teaspoon ground cinnamon .¼ teaspoon fine salt Optional add-ins: .¼ cup (40g) chocolate chips .¼ cup chopped nuts Method 1. Preheat oven to 175°C (350°F). Lightly grease or line a loaf pan. 2. In a large bowl, mash the bananas until smooth. 3. Add eggs, honey (or maple syrup), melted butter (or coconut oil), milk, and vanilla. Mix until well combined. 4. In a separate bowl, whisk together flour, baking soda, cinnamon, and salt. 5. Add the dry ingredients to the wet ingredients and stir gently until just combined. Do not overmix. 6. Fold in optional add-ins if using. 7. Pour batter into the prepared loaf pan and smooth the top. 8. Bake for 45–55 minutes, or until: .A toothpick inserted into the center comes out clean .The top is golden brown .Internal temperature reaches about 96–98°C (205–208°F) 9. Allow the bread to cool in the pan for 10 minutes, then transfer to a wire rack to cool completely. Healthy Bakes Options .V (Vegetarian): Contains no meat products. .DF (Dairy-Free Option): Use coconut oil and plant-based milk. .GF (Gluten-Free Option): Use a gluten-free all-purpose flour blend with xanthan gum. .EF(Egg-Free Option): Replace eggs with 2 flax eggs (2 tbsp ground flaxseed + 6 tbsp water, rested 5 minutes). .Family-Friendly: Soft texture and natural sweetness make it perfect for all ages. Storage .Room temperature (airtight container): up to 3 days .Refrigerated: up to 5–6 days .Frozen (sliced and wrapped well): up to 3 months Ensure the loaf is fully cooled before storing to prevent excess moisture. Daily Delights Tip For extra moisture and flavor, use very ripe bananas with brown spots—they provide natural sweetness and the best texture.
    Love
    2
    0 Σχόλια 0 Μοιράστηκε 3χλμ. Views 0 Προεπισκόπηση
  • Blueberry Baked Oats

    Category: Healthy Bakes / Breakfast
    Labels: V • GF Option • DF Option • EF Option • Family-Friendly
    Yield: 2 servings (or 1 small baking dish)
    Prep Time: 10 minutes
    Bake Time: 20–25 minutes
    Total Time: About 35 minutes

    Description

    Soft, lightly sweet, and filled with juicy blueberries, these Blueberry Baked Oats transform simple oats into a warm, cake-like breakfast. Blended or mixed together with wholesome ingredients, the oats bake into a comforting dish that is nourishing and satisfying.

    Perfect for a cozy morning, meal prep breakfast, or a wholesome snack, this recipe is easy to prepare and naturally adaptable for different dietary needs.

    Ingredients

    .1 cup (90g) rolled oats

    .1 medium ripe banana

    .1 large egg

    .¾ cup (180ml) milk of choice

    .1 tablespoon maple syrup or honey

    .1 teaspoon vanilla extract

    .1 teaspoon baking powder

    .½ teaspoon ground cinnamon

    .Pinch of salt

    .½ cup (75g) fresh or frozen blueberries

    Optional topping:

    .1 tablespoon chopped nuts or extra blueberries

    Method

    1. Preheat oven to 180°C (350°F) and lightly grease a small baking dish or two ramekins.

    2. In a blender, combine the oats, banana, egg, milk, maple syrup, vanilla, baking powder, cinnamon, and salt.

    3. Blend until smooth and thick, about 30–45 seconds.

    4. Pour the batter into the prepared baking dish.

    5. Gently fold or sprinkle the blueberries over the batter.

    6. Add optional toppings if desired.

    7. Bake for 20–25 minutes, until the center is set and the top is lightly golden.

    8. Allow to cool for a few minutes before serving.

    Healthy Bakes Options

    .V (Vegetarian): Contains no meat products.

    .GF Option: Use certified gluten-free rolled oats if needed.

    .DF Option: Use plant-based milk such as almond, oat, or coconut milk.

    .EF Option: Replace the egg with 1 flax egg (1 tablespoon ground flaxseed + 3 tablespoons water, rested for 5 minutes).

    .Family-Friendly: Soft texture and natural sweetness make this ideal for kids and adults.

    Storage

    .Refrigerated (airtight container): up to 4 days

    .Frozen (portioned and wrapped well): up to 2 months

    Reheat gently in the microwave or oven before serving.

    Daily Delights Tip

    For extra flavor, add a small handful of white chocolate chips, lemon zest, or chopped almonds before baking.
    Blueberry Baked Oats Category: Healthy Bakes / Breakfast Labels: V • GF Option • DF Option • EF Option • Family-Friendly Yield: 2 servings (or 1 small baking dish) Prep Time: 10 minutes Bake Time: 20–25 minutes Total Time: About 35 minutes Description Soft, lightly sweet, and filled with juicy blueberries, these Blueberry Baked Oats transform simple oats into a warm, cake-like breakfast. Blended or mixed together with wholesome ingredients, the oats bake into a comforting dish that is nourishing and satisfying. Perfect for a cozy morning, meal prep breakfast, or a wholesome snack, this recipe is easy to prepare and naturally adaptable for different dietary needs. Ingredients .1 cup (90g) rolled oats .1 medium ripe banana .1 large egg .¾ cup (180ml) milk of choice .1 tablespoon maple syrup or honey .1 teaspoon vanilla extract .1 teaspoon baking powder .½ teaspoon ground cinnamon .Pinch of salt .½ cup (75g) fresh or frozen blueberries Optional topping: .1 tablespoon chopped nuts or extra blueberries Method 1. Preheat oven to 180°C (350°F) and lightly grease a small baking dish or two ramekins. 2. In a blender, combine the oats, banana, egg, milk, maple syrup, vanilla, baking powder, cinnamon, and salt. 3. Blend until smooth and thick, about 30–45 seconds. 4. Pour the batter into the prepared baking dish. 5. Gently fold or sprinkle the blueberries over the batter. 6. Add optional toppings if desired. 7. Bake for 20–25 minutes, until the center is set and the top is lightly golden. 8. Allow to cool for a few minutes before serving. Healthy Bakes Options .V (Vegetarian): Contains no meat products. .GF Option: Use certified gluten-free rolled oats if needed. .DF Option: Use plant-based milk such as almond, oat, or coconut milk. .EF Option: Replace the egg with 1 flax egg (1 tablespoon ground flaxseed + 3 tablespoons water, rested for 5 minutes). .Family-Friendly: Soft texture and natural sweetness make this ideal for kids and adults. Storage .Refrigerated (airtight container): up to 4 days .Frozen (portioned and wrapped well): up to 2 months Reheat gently in the microwave or oven before serving. Daily Delights Tip For extra flavor, add a small handful of white chocolate chips, lemon zest, or chopped almonds before baking.
    Like
    Love
    2
    0 Σχόλια 0 Μοιράστηκε 3χλμ. Views 0 Προεπισκόπηση
  • #Glossary
    Vegan Chocolate Chip Cookies

    Category: Sweet Treats
    Labels: VN • DF • EF • Family-Friendly
    Yield: 12–16 cookies
    Prep Time: 10 minutes
    Bake Time: 10–12 minutes
    Total Time: Approximately 25 minutes

    Description

    These Vegan Chocolate Chip Cookies are soft in the center, lightly crisp around the edges, and filled with rich chocolate chips. Made without eggs or dairy, they rely on simple pantry ingredients to create a balanced cookie dough that bakes into delicious, satisfying treats.

    Perfect for everyday baking, sharing with friends, or enjoying with a warm drink.

    Ingredients

    .½ cup (115g) vegan butter or dairy-free baking spread, softened

    .½ cup (100g) light brown sugar

    .¼ cup (50g) granulated sugar

    .¼ cup (60ml) unsweetened plant milk (such as almond, oat, or soy)

    .1 teaspoon pure vanilla extract

    .1½ cups (180g) all-purpose flour

    .½ teaspoon baking soda

    .¼ teaspoon fine salt

    .¾ cup (130g) vegan chocolate chips

    Method

    1. Preheat oven to 180°C (350°F). Line a baking sheet with parchment paper.

    2. In a mixing bowl, cream together the vegan butter, brown sugar, and granulated sugar until smooth and slightly fluffy.

    3. Add the plant milk and vanilla extract. Stir until well combined.

    4. In a separate bowl, whisk together flour, baking soda, and salt.

    5. Gradually mix the dry ingredients into the wet mixture until a soft dough forms.

    6. Fold in the vegan chocolate chips.

    7. Scoop tablespoon-sized portions of dough and place them onto the prepared baking sheet, leaving space between cookies.

    8. Bake for 10–12 minutes, until edges are lightly golden while the centers remain soft.

    9. Allow cookies to cool on the baking sheet for 5 minutes before transferring to a wire rack to cool completely.

    Healthy Bakes Options

    .VN (Vegan): Uses plant-based ingredients with no animal products.

    .DF (Dairy-Free): Made with vegan butter and dairy-free chocolate chips.

    .EF (Egg-Free): No eggs required; plant milk provides moisture and structure.

    .Family-Friendly: Soft texture and classic flavor appeal to both children and adults.

    Storage

    .Room temperature (airtight container): up to 3 days

    .Refrigerated: up to 5 days

    .Frozen (baked cookies or raw dough): up to 3 months

    Allow cookies to cool fully before storing to maintain texture.

    Daily Delights Tip

    For thicker cookies, chill the dough in the refrigerator for 20–30 minutes before baking.
    #Glossary Vegan Chocolate Chip Cookies Category: Sweet Treats Labels: VN • DF • EF • Family-Friendly Yield: 12–16 cookies Prep Time: 10 minutes Bake Time: 10–12 minutes Total Time: Approximately 25 minutes Description These Vegan Chocolate Chip Cookies are soft in the center, lightly crisp around the edges, and filled with rich chocolate chips. Made without eggs or dairy, they rely on simple pantry ingredients to create a balanced cookie dough that bakes into delicious, satisfying treats. Perfect for everyday baking, sharing with friends, or enjoying with a warm drink. Ingredients .½ cup (115g) vegan butter or dairy-free baking spread, softened .½ cup (100g) light brown sugar .¼ cup (50g) granulated sugar .¼ cup (60ml) unsweetened plant milk (such as almond, oat, or soy) .1 teaspoon pure vanilla extract .1½ cups (180g) all-purpose flour .½ teaspoon baking soda .¼ teaspoon fine salt .¾ cup (130g) vegan chocolate chips Method 1. Preheat oven to 180°C (350°F). Line a baking sheet with parchment paper. 2. In a mixing bowl, cream together the vegan butter, brown sugar, and granulated sugar until smooth and slightly fluffy. 3. Add the plant milk and vanilla extract. Stir until well combined. 4. In a separate bowl, whisk together flour, baking soda, and salt. 5. Gradually mix the dry ingredients into the wet mixture until a soft dough forms. 6. Fold in the vegan chocolate chips. 7. Scoop tablespoon-sized portions of dough and place them onto the prepared baking sheet, leaving space between cookies. 8. Bake for 10–12 minutes, until edges are lightly golden while the centers remain soft. 9. Allow cookies to cool on the baking sheet for 5 minutes before transferring to a wire rack to cool completely. Healthy Bakes Options .VN (Vegan): Uses plant-based ingredients with no animal products. .DF (Dairy-Free): Made with vegan butter and dairy-free chocolate chips. .EF (Egg-Free): No eggs required; plant milk provides moisture and structure. .Family-Friendly: Soft texture and classic flavor appeal to both children and adults. Storage .Room temperature (airtight container): up to 3 days .Refrigerated: up to 5 days .Frozen (baked cookies or raw dough): up to 3 months Allow cookies to cool fully before storing to maintain texture. Daily Delights Tip For thicker cookies, chill the dough in the refrigerator for 20–30 minutes before baking.
    Love
    Yay
    2
    0 Σχόλια 0 Μοιράστηκε 3χλμ. Views 0 Προεπισκόπηση
Αναζήτηση αποτελεσμάτων
MYSERA https://www.mysera.social